I say that not to brag, but because it makes what happened next a little harder to explain.
Brian’s favorite dessert is apple crisp. And since I already make a pretty good cheesecake, I had what seemed like a brilliant idea: Why not combine the two?
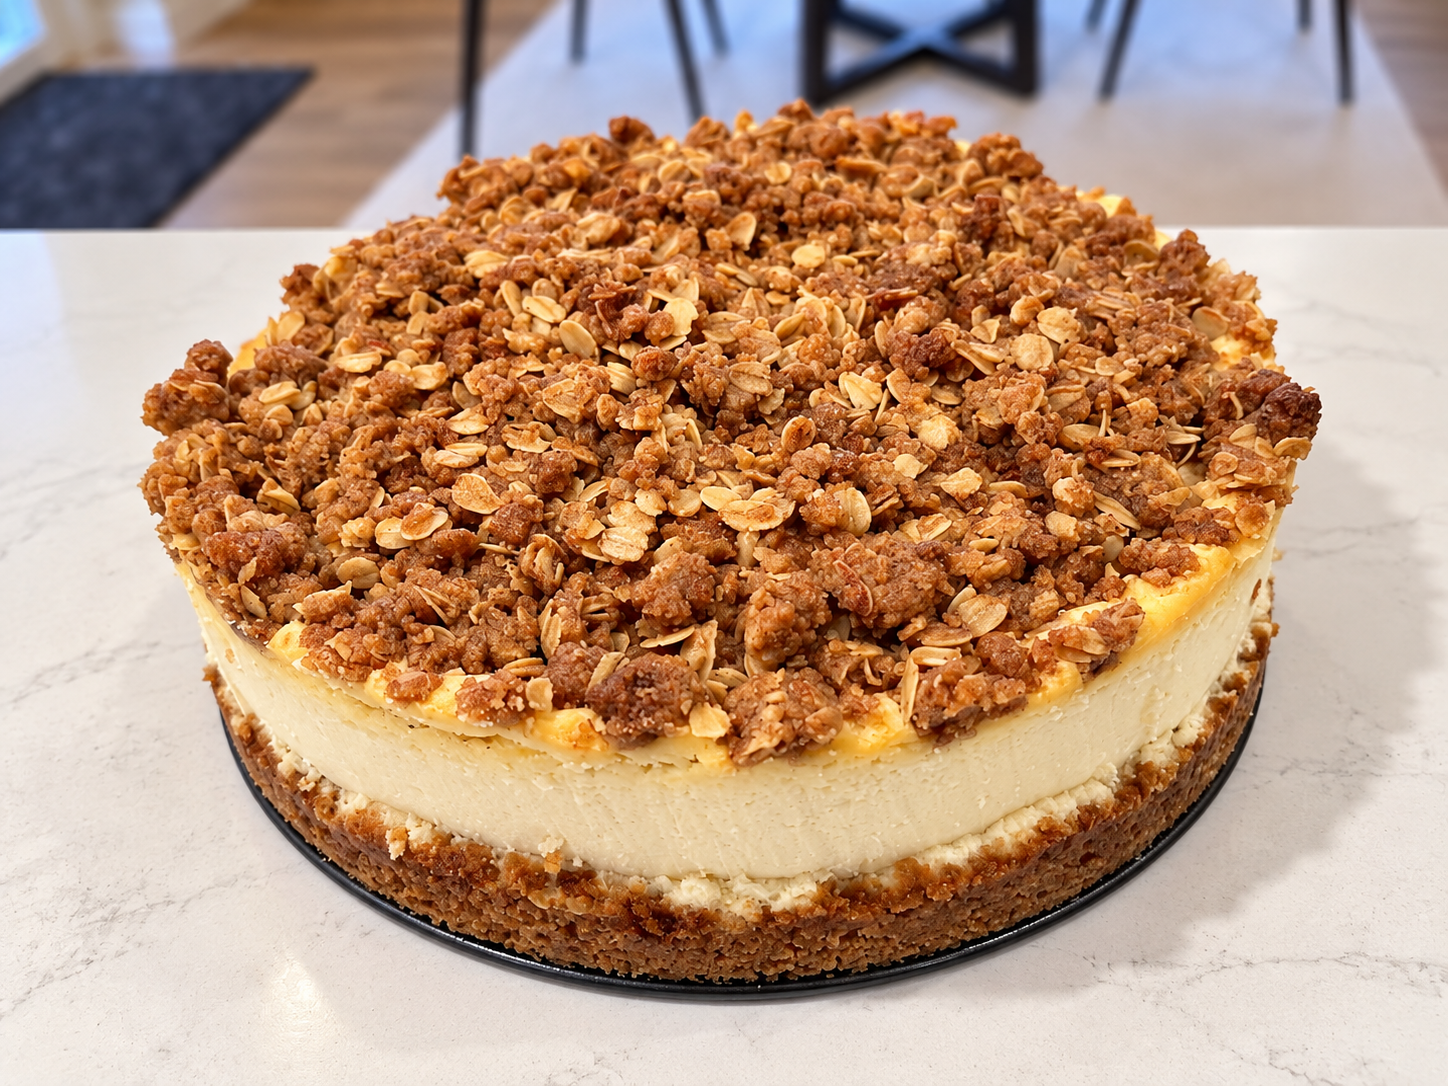
Apple crisp cheesecake. Creamy cheesecake, thinly sliced apples, and that buttery, cinnamon-sugar crisp topping.
In my head, this dessert was going to be fantastic.
And honestly, from the outside, it looked pretty fantastic, too.
A Dessert That Looked Like It Had Its Life Together
I made my usual cheesecake recipe and added the apples and a crisp topping made with butter, flour, oats, and brown sugar.
Everything went into the oven, and I waited for the magic to happen.
When it came out, the top looked good. The apples and crisp topping looked like they belonged there. Nothing about the outside suggested that I was about to have a baking problem.
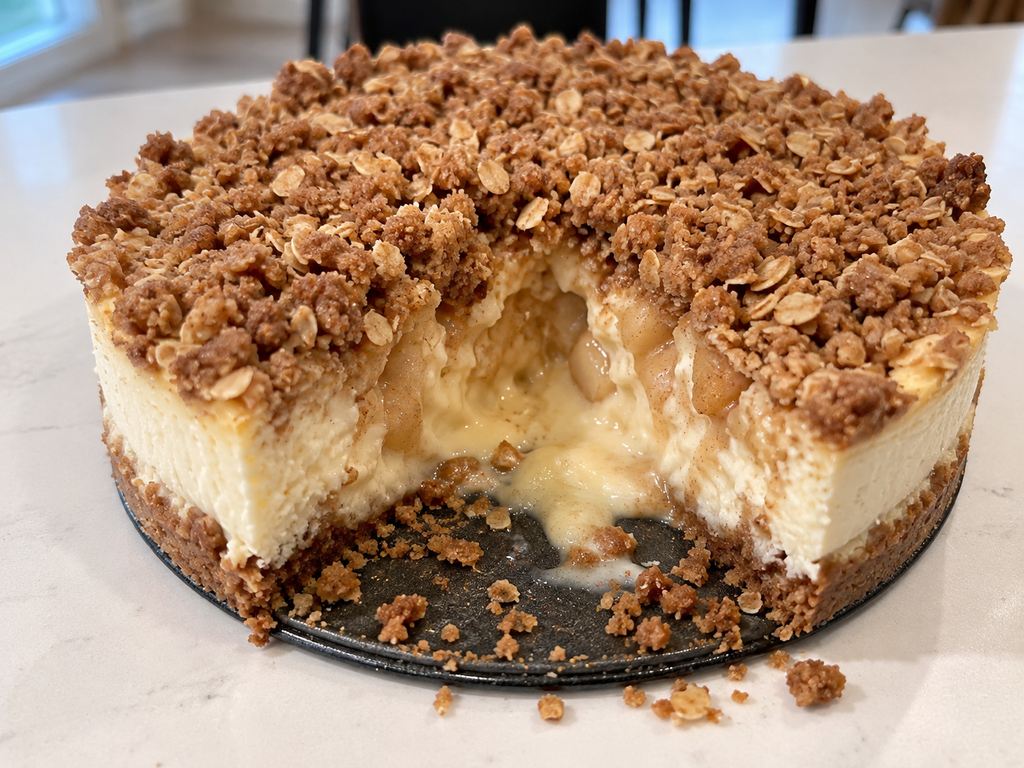
Then I cut into it.
The middle was basically soup.
Not a little softer than expected. Not a little underdone. Soup.
The edges were done enough that we tried to salvage a few pieces, because wasting dessert is a hard thing to accept when you’ve put the time and ingredients into making it. But the center wasn’t going to cooperate, and eventually, the whole thing had to go.
So much for my brilliant idea.
I still don’t know exactly what went wrong. Maybe the added apples and topping affected how the cheesecake baked. Maybe the combination needed a different approach. Whatever the reason, my usual cheesecake recipe wasn’t enough to make this particular experiment work.
And that happens sometimes.
When Things Don’t Turn Out the Way You Planned
It’s funny how a failed dessert can remind you of something bigger.
We make plans. We put in the time. We gather the ingredients, follow the steps, and picture how everything is going to turn out.
Sometimes it works beautifully.
And sometimes you cut into the cheesecake and discover that the middle is soup.
Life does that, too.
You can make a thoughtful plan, do what you believe are all the right things, and still end up with a result you didn’t expect. A project doesn’t work out. A plan changes. Something you were excited about turns into a disappointment.
It doesn’t necessarily mean you did everything wrong. Sometimes the plan needs adjusting. Sometimes you learn something you didn’t know before. And sometimes, despite your best efforts, the thing simply doesn’t work.
That’s frustrating, especially when you’ve invested time, money, energy, or hope into the outcome.
But a disappointing result doesn’t automatically make the effort a waste.
Knowing When to Salvage It—and When to Let It Go
With the cheesecake, we tried to save what we could. The parts that were cooked through were worth trying, but there was no point pretending the rest was going to turn into something it wasn’t.
Eventually, we threw it away.
There is probably a life lesson in there somewhere about knowing what to hold on to and what to let go of. I’ll leave the deep philosophical interpretation to someone who hasn’t just lost an entire cheesecake.
But I do think there’s something useful in remembering that you don’t have to keep forcing something to work just because you’ve already invested in it.
Sometimes you can salvage part of the plan. Sometimes you can make a change and try again. And sometimes the best thing you can do is acknowledge that it didn’t work and move on.
You can be disappointed without deciding the whole experience was pointless.
You can learn something without turning every mistake into a major personal-growth exercise.
And you can decide that next time, you might approach things a little differently.
Would I Try It Again?
Maybe!
I still like cheesecake. Brian still likes apple crisp. And I’m not ready to declare the combination a lost cause just because my first attempt ended in dessert soup.
I would need to rethink the approach rather than simply repeat the same recipe and hope for a different result.
For now, though, I have accepted that this particular cheesecake was not meant to be.
Not every idea is a winner. Not every experiment deserves a second attempt right away. And not every kitchen mishap needs to become a new family favorite.
Sometimes it’s just a story you get to laugh about later.
The Worth It Test
Was the apple crisp cheesecake worth it?
The dessert itself: One star. It looked promising, but the center never set properly, and we ultimately had to throw it away.
The experience: Still worth something. I tried an idea, learned that my usual recipe didn’t work for this combination, and got a story out of it.
Would I count it as a successful recipe? Absolutely not.
Would I count it as a complete waste? Not entirely.
Because life is going to hand us a few cheesecake-soup moments along the way. Sometimes things won’t turn out the way we planned, even when we’re pretty sure we know what we’re doing.
And that’s okay.
Not everything has to turn out the way we planned for the experience to be worth something.
When we moved into our current home, we knew we wanted to approach furnishing it differently.
In our previous home, we bought furniture piece by piece as we needed it. There was nothing necessarily wrong with that, but over time, the rooms didn’t feel as cohesive as we wanted them to. Each purchase made sense on its own, but the house never quite came together the way we’d pictured.
This time, we decided to be more intentional.
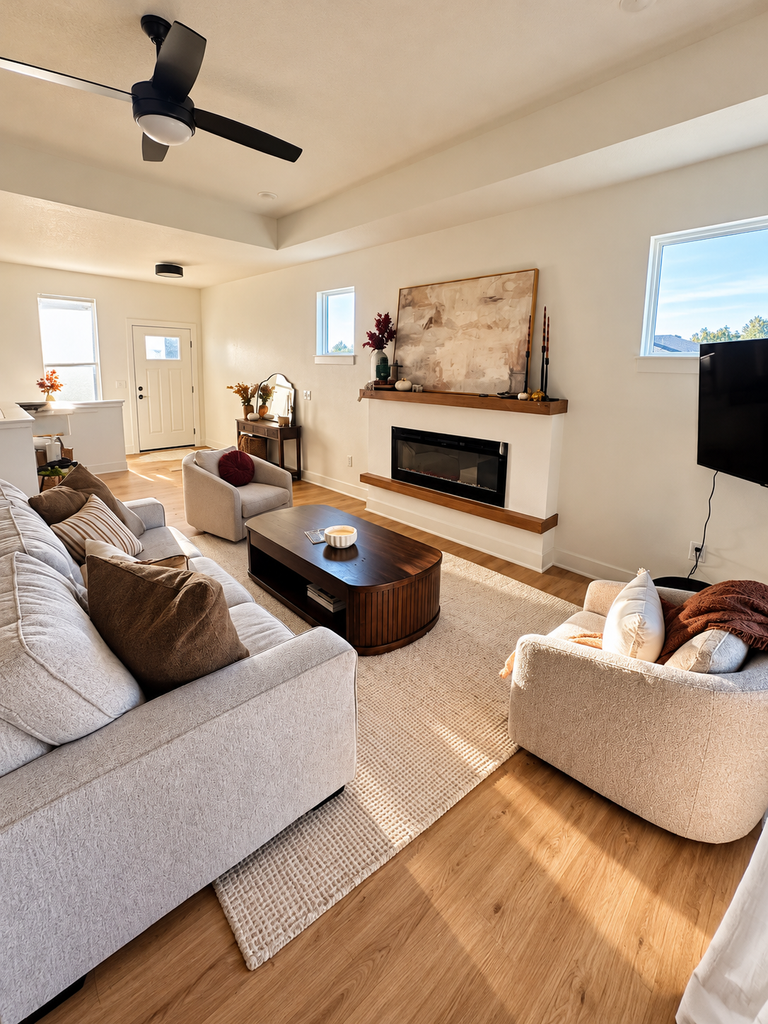
As we prepared to move, we sold our previous furniture and planned for new furnishings as part of our moving expenses. We wanted a warm, comfortable, organic-modern feel, with pieces that worked together instead of making each room feel like a separate project.
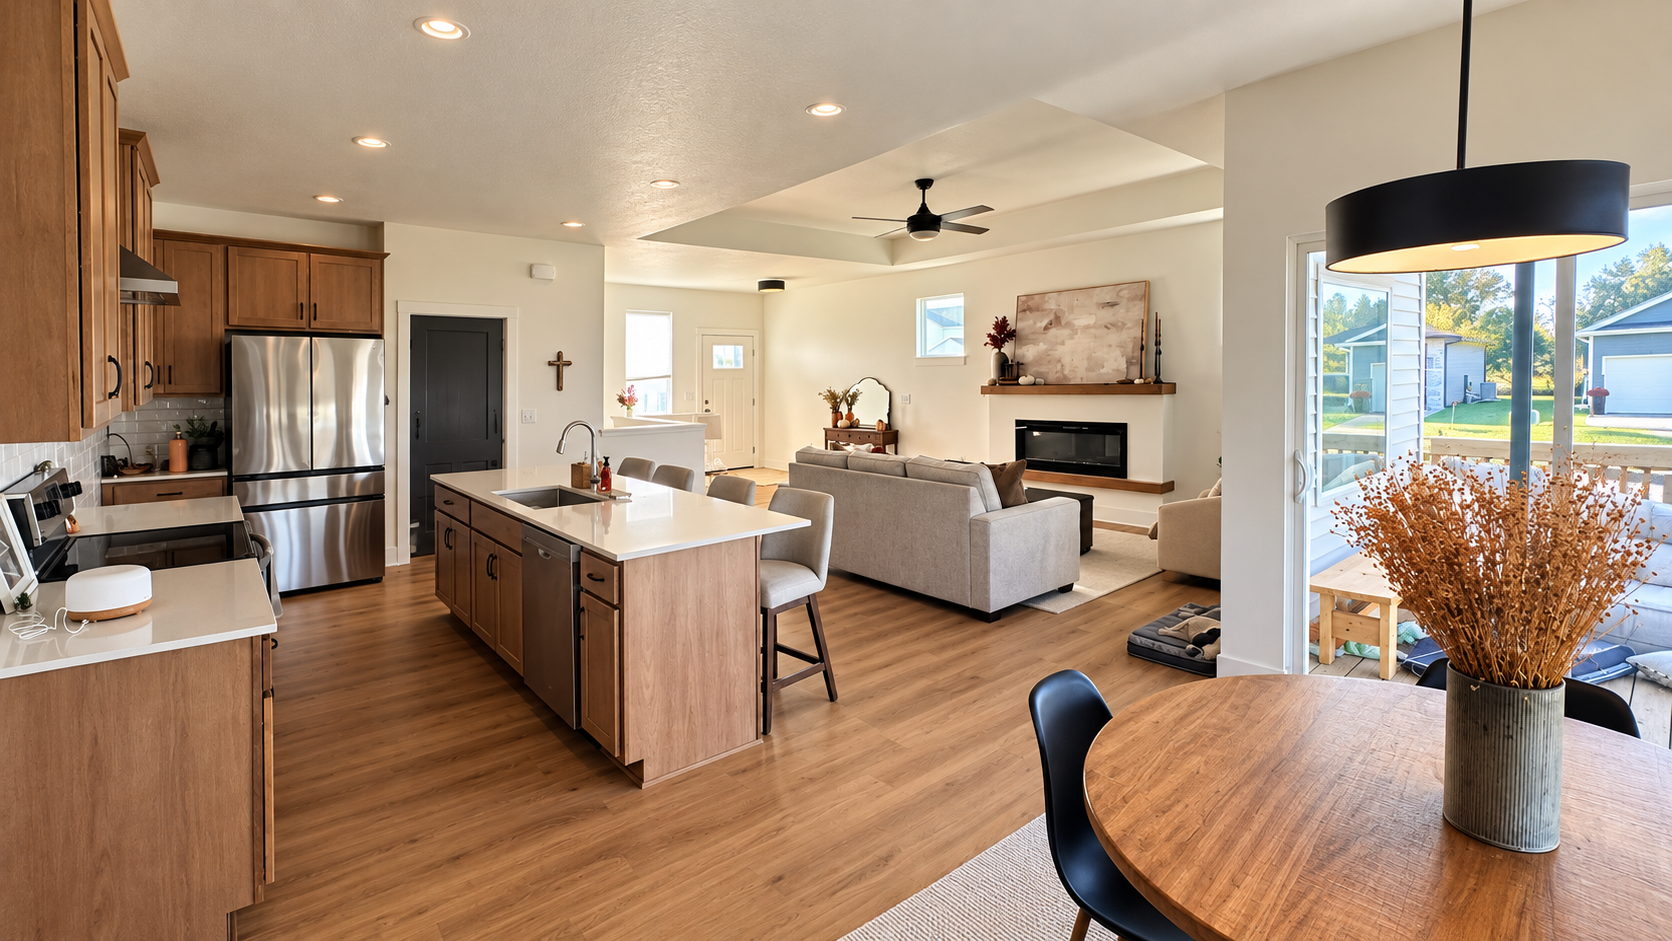
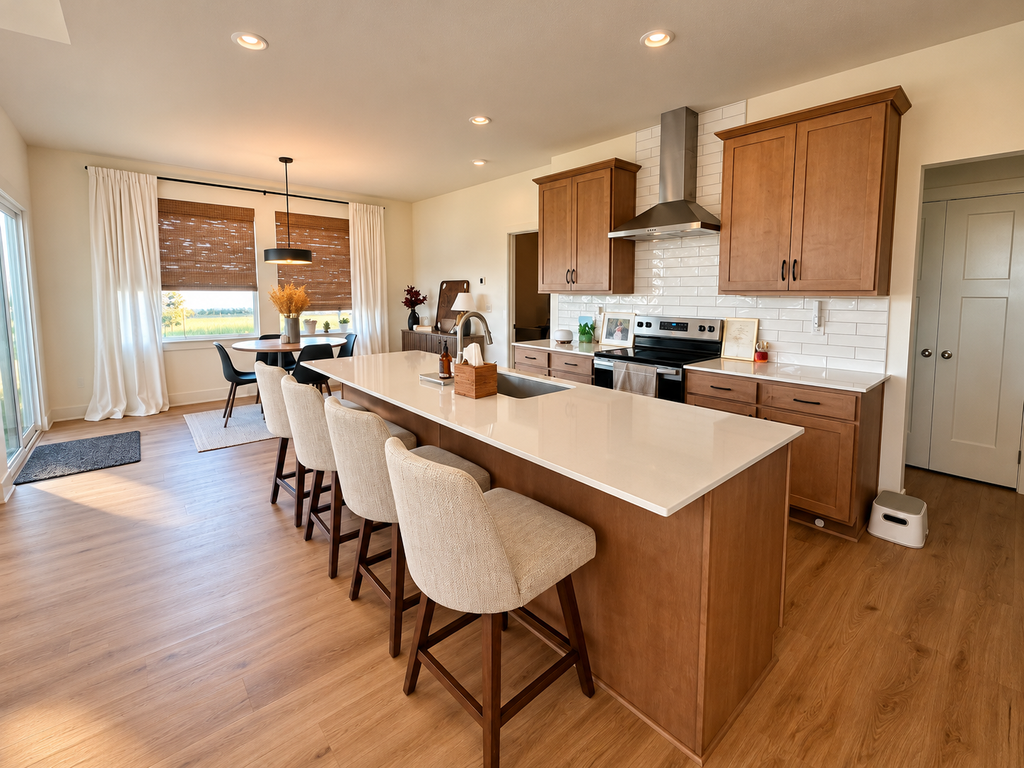
Our living room, dining area, and kitchen island all connect in one open floor plan, so the decisions we made in one area affected the others.
We also wanted a home that felt like us. A place where people could gather, where our meaningful family pieces had a place, and where we could relax without worrying about everything looking perfect.
So, what did we actually spend?
The purchases included in this breakdown totaled approximately $5,086. That’s real money, and I’m not going to pretend otherwise. But the more interesting part is how we decided where to spend, where we found deals, and what we learned along the way.
Why We Approached It Differently This Time
Our biggest lesson from the last house was that buying furniture one piece at a time doesn’t always create the overall look you’re hoping for.
This time, we thought about the connected spaces as a whole. We considered colors, textures, comfort, and how we wanted the rooms to feel when we were spending time together.
That didn’t mean buying everything from one store or choosing the most expensive option. It meant having a general vision and trying to make thoughtful decisions within our budget.
Some things were worth spending more on. Other purchases were opportunities to save. And some things we already owned were worth keeping.
That balance became the foundation for furnishing the space.
The Living Room: Comfort Was Worth Prioritizing
The living room was one of the biggest parts of the investment because we wanted it to feel comfortable and welcoming, not just look good in a photograph.
The West Elm Swivel Chairs
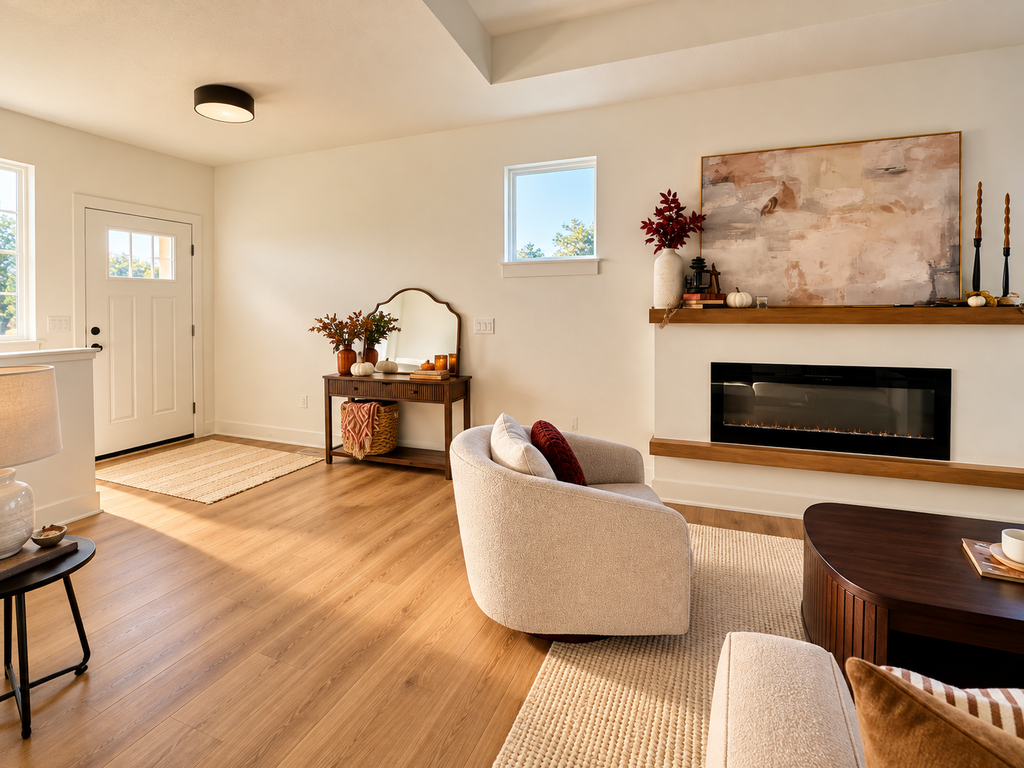
Our two West Elm Imogene swivel chairs in bouclé were one of the bigger purchases: $2,115 for both chairs.
We decided to splurge a little here because comfort mattered to us. We wanted chairs that felt good to sit in and that we’d genuinely enjoy using—not just chairs that looked nice in the room.
But that decision didn’t happen in a vacuum. We found such a good deal on our sleeper sofa that it gave us more flexibility to spend on the chairs. If we’d paid more for the couch, we might have made a different decision.
That’s something I’ve learned about furnishing a home: sometimes one good deal gives you room to spend a little more somewhere else. It’s not about making every purchase the cheapest option. It’s about deciding what matters most to you and making the overall budget work.
The Sleeper Sofa
We found an Ashley Larimer queen sleeper sofa in stone for about $350.
Finding a sofa at that price made a real difference in how we could allocate our budget. It also gave us a practical option for accommodating overnight guests without dedicating an entire room to a guest bed.
This was a good reminder that a lower price doesn’t automatically mean you have to settle for something that doesn’t work for your home.
The Coffee Table
We spent approximately $500 on an Ashley Korestone lift-top coffee table with casters.
We wanted something that fit the room while also serving a purpose. The lift-top design adds functionality, and the casters make it easier to move around when we need to adjust the space.
When you’re furnishing a home, practical features matter just as much as appearance. A piece can look good, but if it doesn’t work for the way you live, you’re probably not going to love it for long.
The Living Room Rug
We also spent about $500 on a large rug from Homemakers.
The living room is connected to the rest of the open floor plan, so the rug helps define that area without putting up a wall or visually separating it from the dining room and kitchen.
In an open space, each area needs to feel distinct enough to serve its purpose while still working with everything around it. The rug helped us accomplish that.
The Kitchen Island: Finding the Right Bar Stools
The bar stools were surprisingly one of the hardest things to find.
Because our kitchen island opens into the living and dining area, they couldn’t feel like an afterthought. We wanted something that worked with the rest of the furniture and helped the whole space feel connected.
We ended up with four Armen Living Amelia beige bar stools at $225.99 each, for a total of $903.96.
That was a meaningful part of the budget, but finding pieces that worked together was important to us.
I think this is one of the challenges of an open floor plan that people don’t always consider. You aren’t furnishing three completely separate rooms. You’re choosing pieces that will all be visible together, so the wrong color, shape, or style can stand out more than you expect.
Sometimes finding the right piece takes longer than you think it should. We learned that it was worth being patient instead of buying something just to get the room finished.
The Dining Area: Keeping What We Already Loved
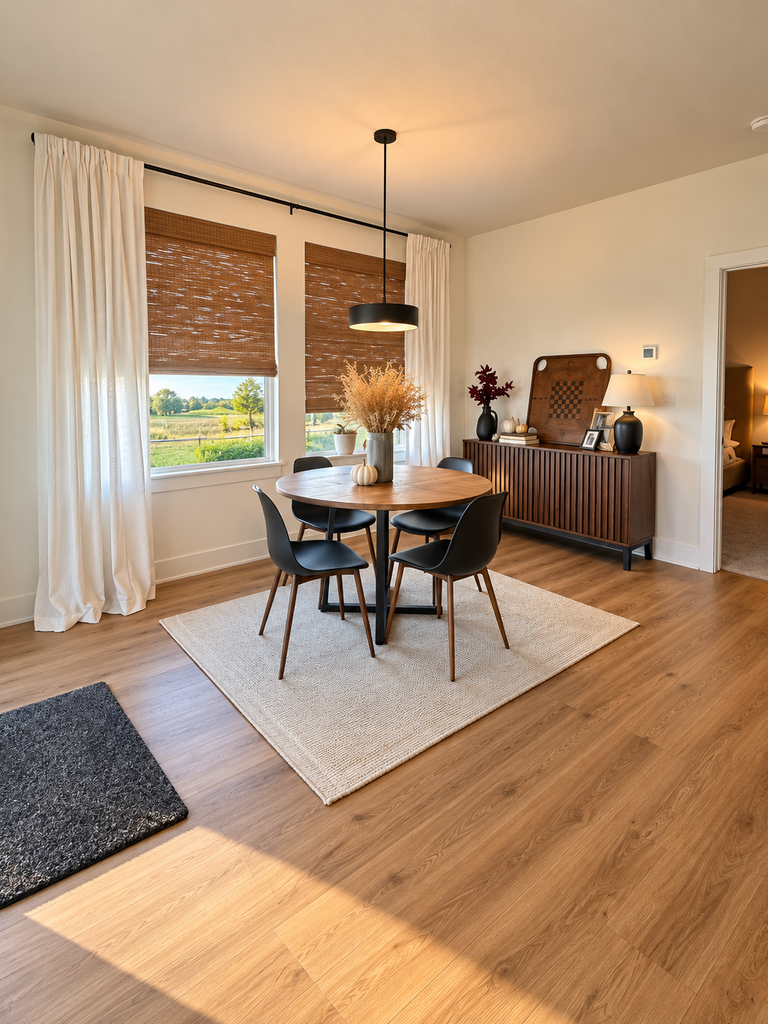
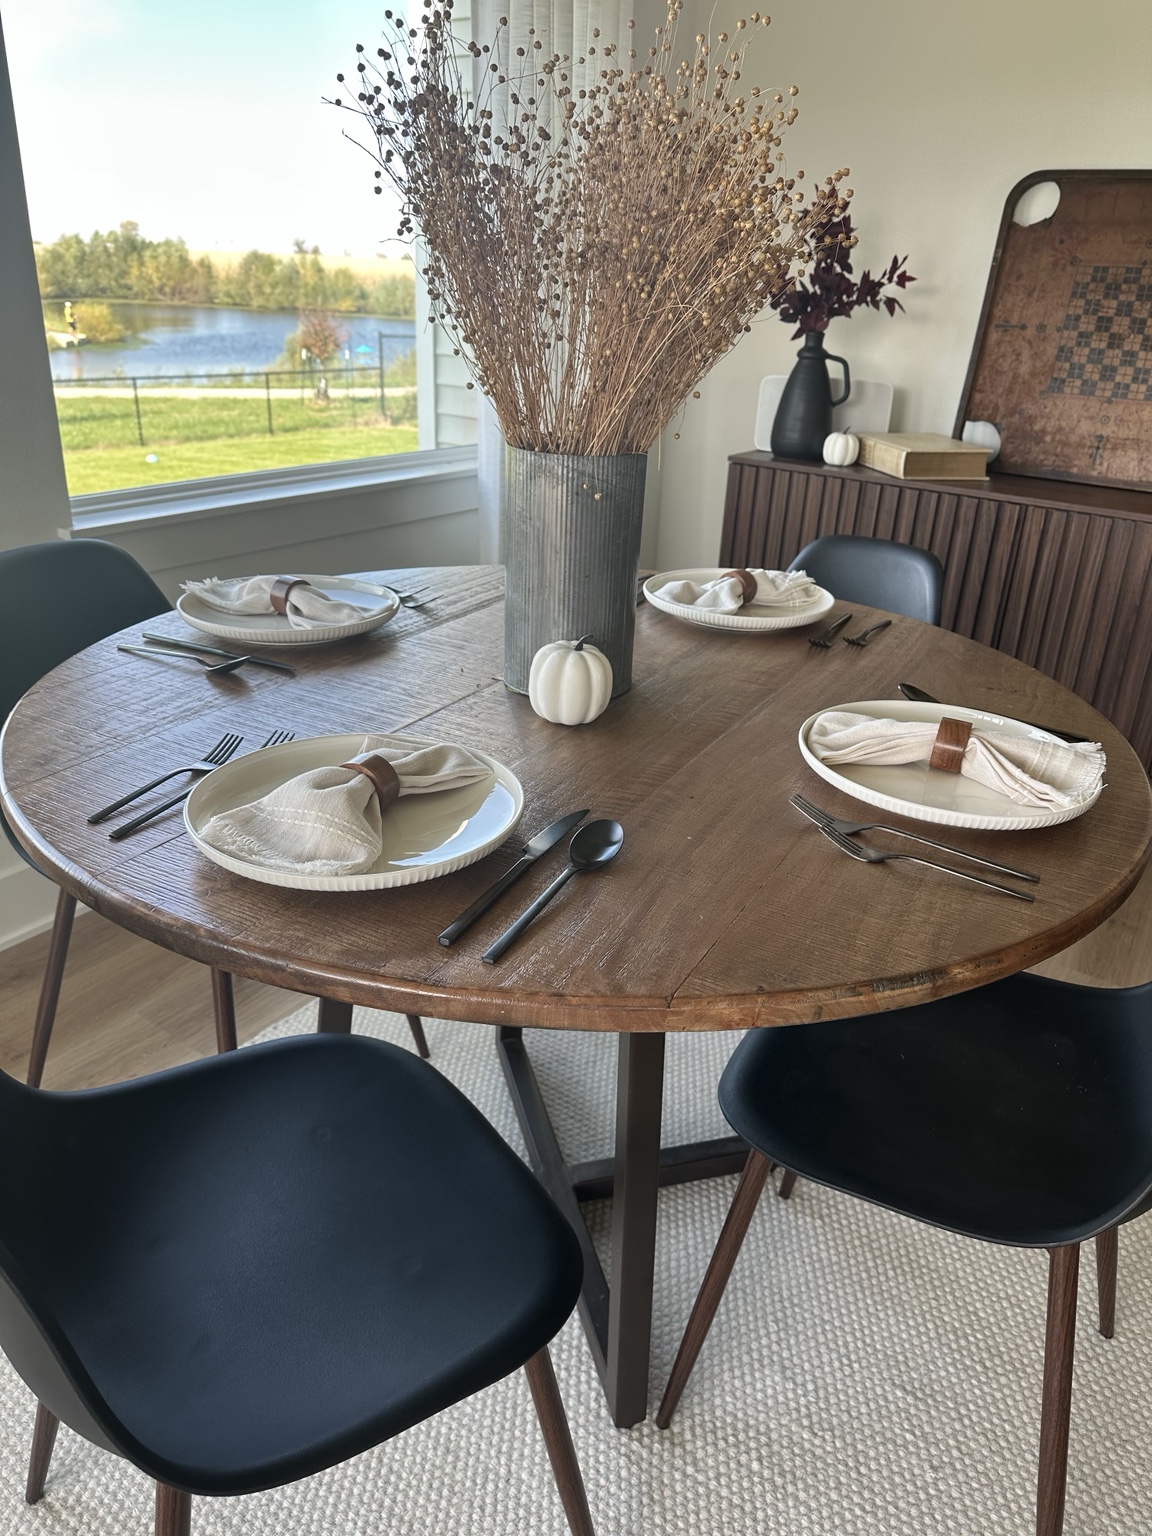
One of the ways we avoided spending even more was by keeping our existing round dining table and chairs.
They still worked for our family, and there was no reason to replace them simply because we were buying other new furniture.
We did purchase a smaller rug from HomeGoods for about $120 to help define the dining area.
We also bought a walnut dining buffet for $224. It gave us additional storage and a place to display some of the things that make our home personal.
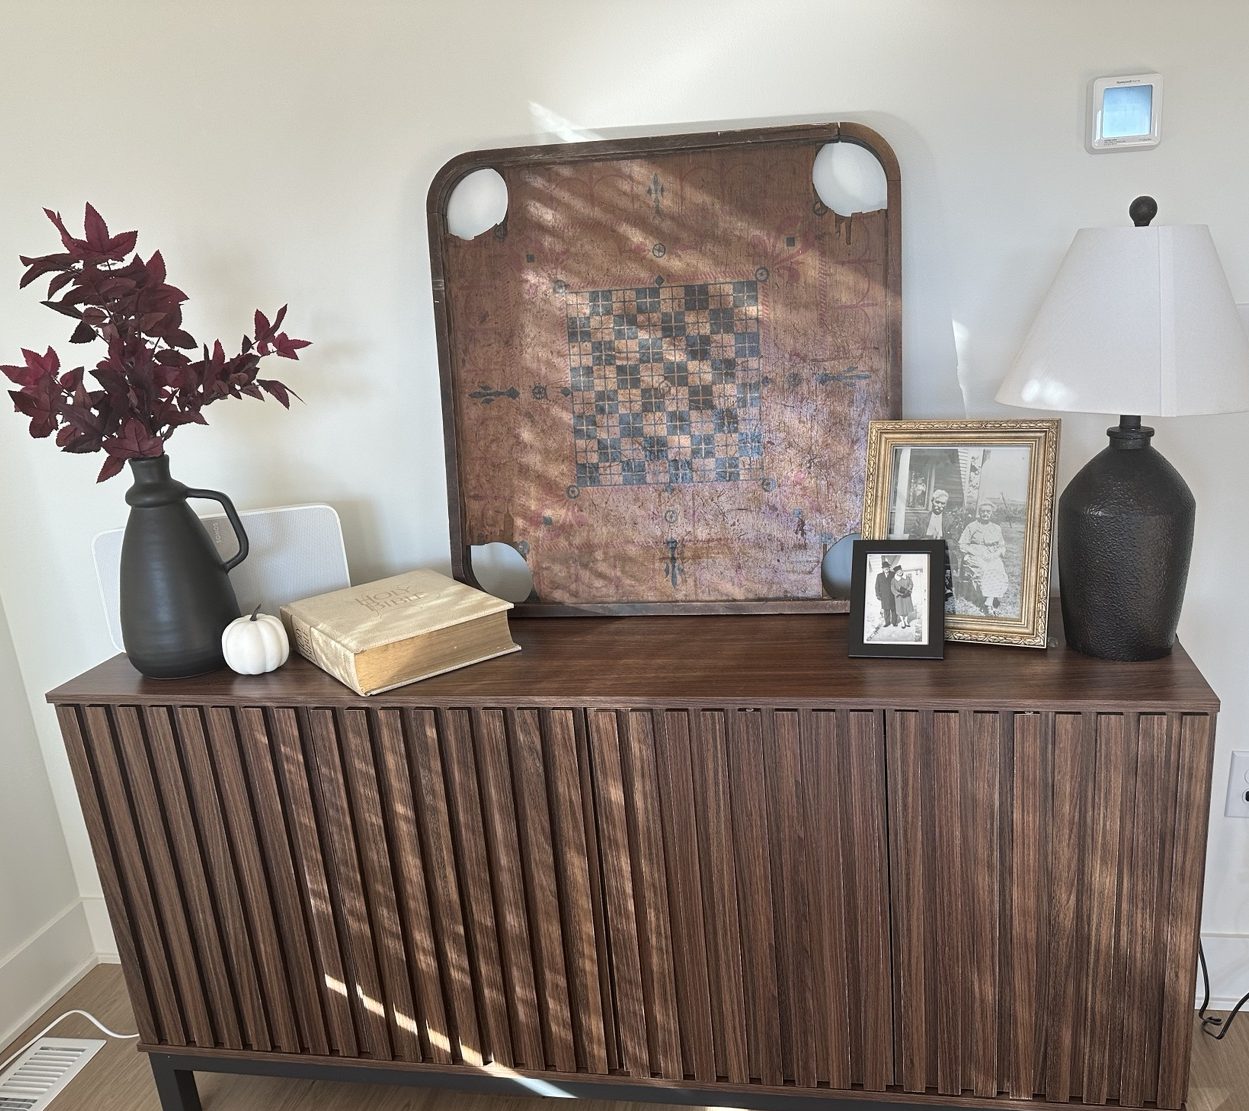
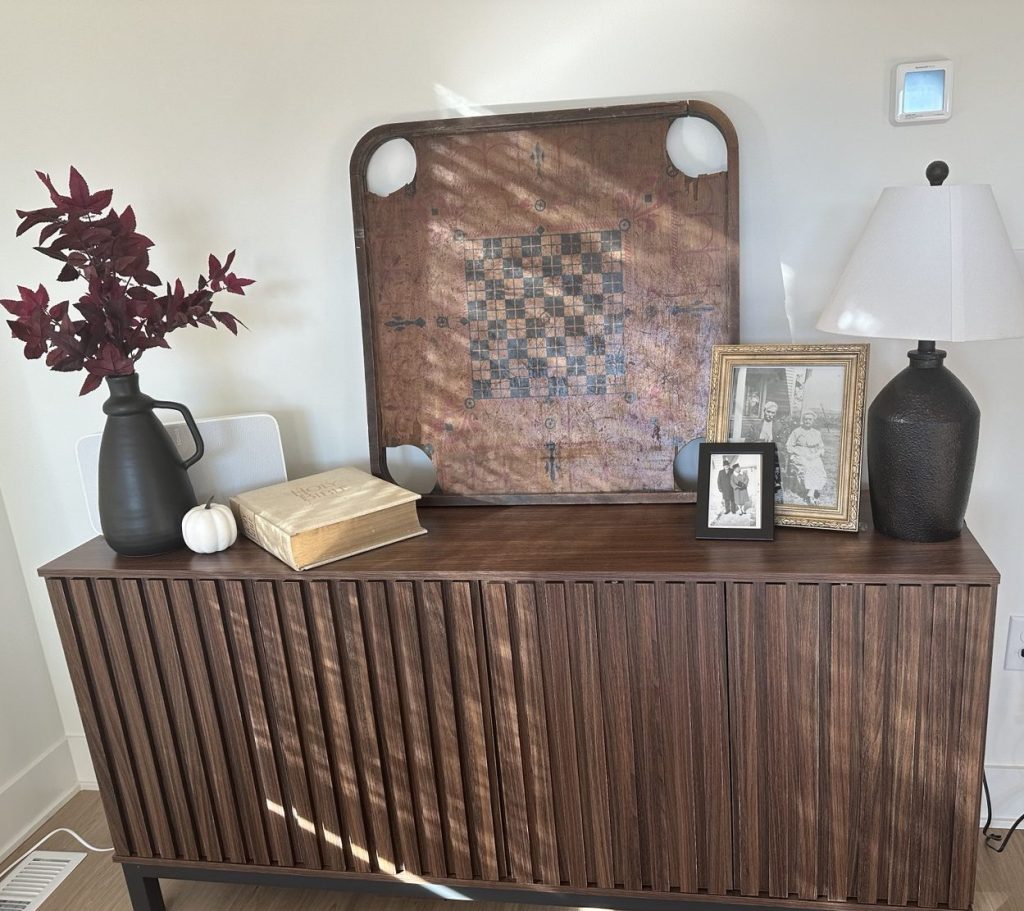
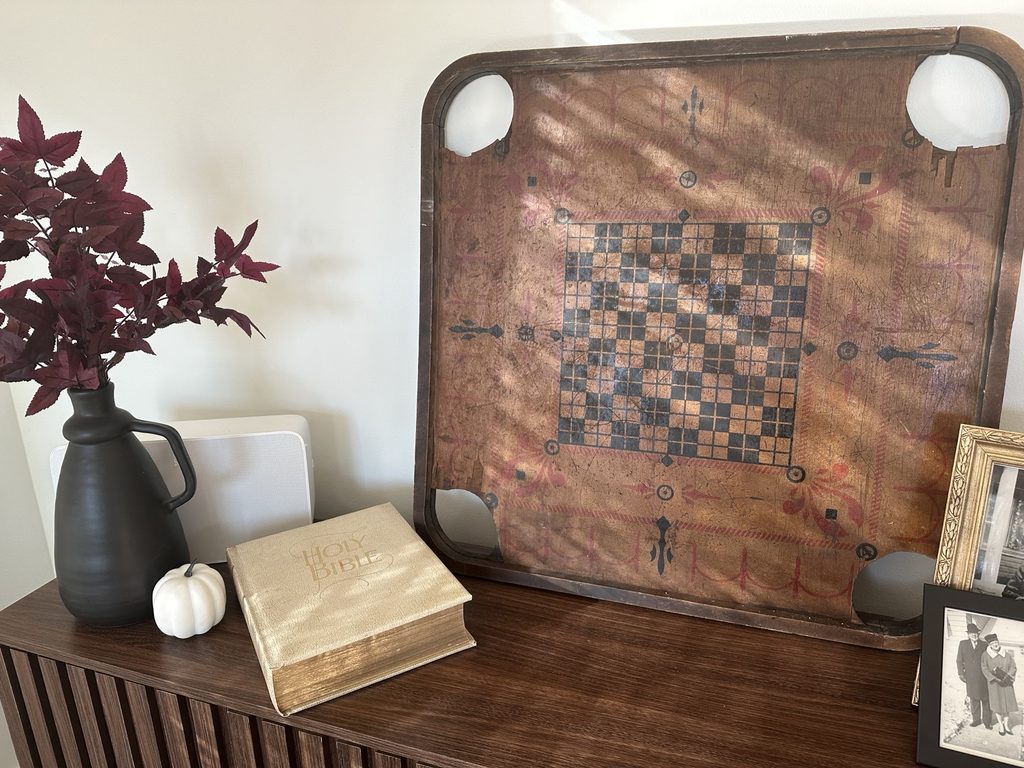
On top of the buffet are Brian’s family Bible, a gameboard that belonged to his grandma, and family photographs. Those aren’t things we’d replace just because a different accessory might look better in a decorating magazine.
They have a history, and they mean something to us.
That’s part of what I want our home to be: a space that looks pulled together but still reflects the people who live here. I don’t want it to look like a furniture showroom. I want it to feel like home.
The Entryway: Small Details That Make a Difference
We also furnished the entryway with two pieces.
The entryway table from Amazon cost $133, and the Elden wood bench with a loose cushion from Target cost $240.
These weren’t the biggest purchases on our list, but they helped make the entrance feel more finished and functional.
It’s easy to focus on the large pieces when you’re furnishing a home, but smaller areas matter too. The entryway is one of the first places you see when you come inside, and having a place to sit or set things down can make everyday life a little easier.
We didn’t need elaborate decor or a lot of accessories. We wanted the space to feel welcoming and useful.
What We Actually Spent
Here’s the breakdown of the purchases discussed in this article.
Item
Cost
Two West Elm Imogene swivel chairs
$2,115.00
Ashley Larimer queen sleeper sofa
About $350.00
Ashley Korestone lift-top coffee table
About $500.00
Four Armen Living Amelia bar stools
$903.96
Large living room rug from Homemakers
About $500.00
Smaller dining-area rug from HomeGoods
About $120.00
Walnut dining buffet
$224.00
Entryway table from Amazon
$133.00
Elden wood bench from Target
$240.00
Total for listed purchases
About $5,085.96
Some of these amounts are approximate, so it’s best to think of the total as roughly $5,086.
This is the total for the purchases listed above, not necessarily every dollar spent furnishing the entire home. We also kept our existing dining table and chairs, which meant we didn’t have to buy replacements.
Looking at the total, I can see how quickly furnishing a home adds up. But I can also see where our money went and why we made the choices we did.
We spent more on the chairs because comfort was important to us. We benefited from a great deal on the sofa. We kept furniture that still worked. And we took our time looking for bar stools that fit the overall space.
None of those decisions was especially complicated on its own, but together they helped us create a home that feels more intentional.
What We Learned Along the Way
Looking back, there are a few things I’d do again.
1. Think about connected spaces as a whole.
If you have an open floor plan, consider how furniture, colors, and textures will look together. You don’t have to buy everything at once, but having a general vision can help you avoid purchases that don’t work with the rest of the space.
2. Decide where comfort matters most.
For us, the swivel chairs were worth spending more on. We use our living room, and we wanted those chairs to be comfortable. Your priorities might be different. The important thing is knowing what matters to you before you start shopping.
3. Let a good deal create flexibility.
The sofa deal gave us more room in the budget for the chairs. We didn’t save money on every single item, but we considered the purchases together rather than treating each one as an isolated decision.
4. Be patient when you’re looking for the right piece.
The bar stools took more effort to find than we expected. It would have been easy to buy something that was simply available, but we wanted the pieces in our open space to work together. Waiting helped us stay closer to the vision we had for our home.
5. Keep what still works—and what means something.
Our dining table and chairs didn’t need to be replaced. The family Bible and grandma’s gameboard weren’t just decorative objects to us. Keeping useful and meaningful things helped our home feel personal instead of starting from scratch with everything.
6. Remember that a finished home doesn’t have to be perfect.
We wanted our home to feel warm, comfortable, and cohesive. That doesn’t mean every corner has to be styled or every purchase has to be expensive. The goal was to create a space that works for our family and feels good to live in.
The Worth It Test
Was spending approximately $5,086 on these furnishings worth it?
For us, I think so.
We made a conscious decision to budget for new furniture when we moved. We prioritized the pieces that mattered most, took advantage of a good deal, and kept items we already owned when they still worked.
We didn’t spend the same amount on every part of the room, and we didn’t buy things just to fill space. We wanted furniture that worked together, felt comfortable, and would serve us well over time.
Would everyone need to spend this much to create a home they love? Absolutely not. Your budget, your home, and your priorities may look completely different from ours.
But for us, the investment was about more than the furniture itself. It was about creating a home where we could relax, spend time together, welcome family and friends, and surround ourselves with things that have meaning.
And that, to us, is what makes it worth it.
Our Worth It Test: 5 out of 5 stars — Absolutely worth it.
Not because we bought the most expensive furniture, or because every purchase was perfect, but because we made choices that fit the way we wanted to live.
That’s what we’re trying to do with Worth the Making: figure out what’s worth the time, money, and effort—and be honest about what isn’t.
Sometimes you want homemade cinnamon rolls without turning breakfast into an all-morning project. You want the soft dough, the cinnamon-sugar swirl, and the sweet glaze—but you don’t necessarily want to wait for yeast dough to rise.
That’s where these Greek yogurt cinnamon rolls come in.
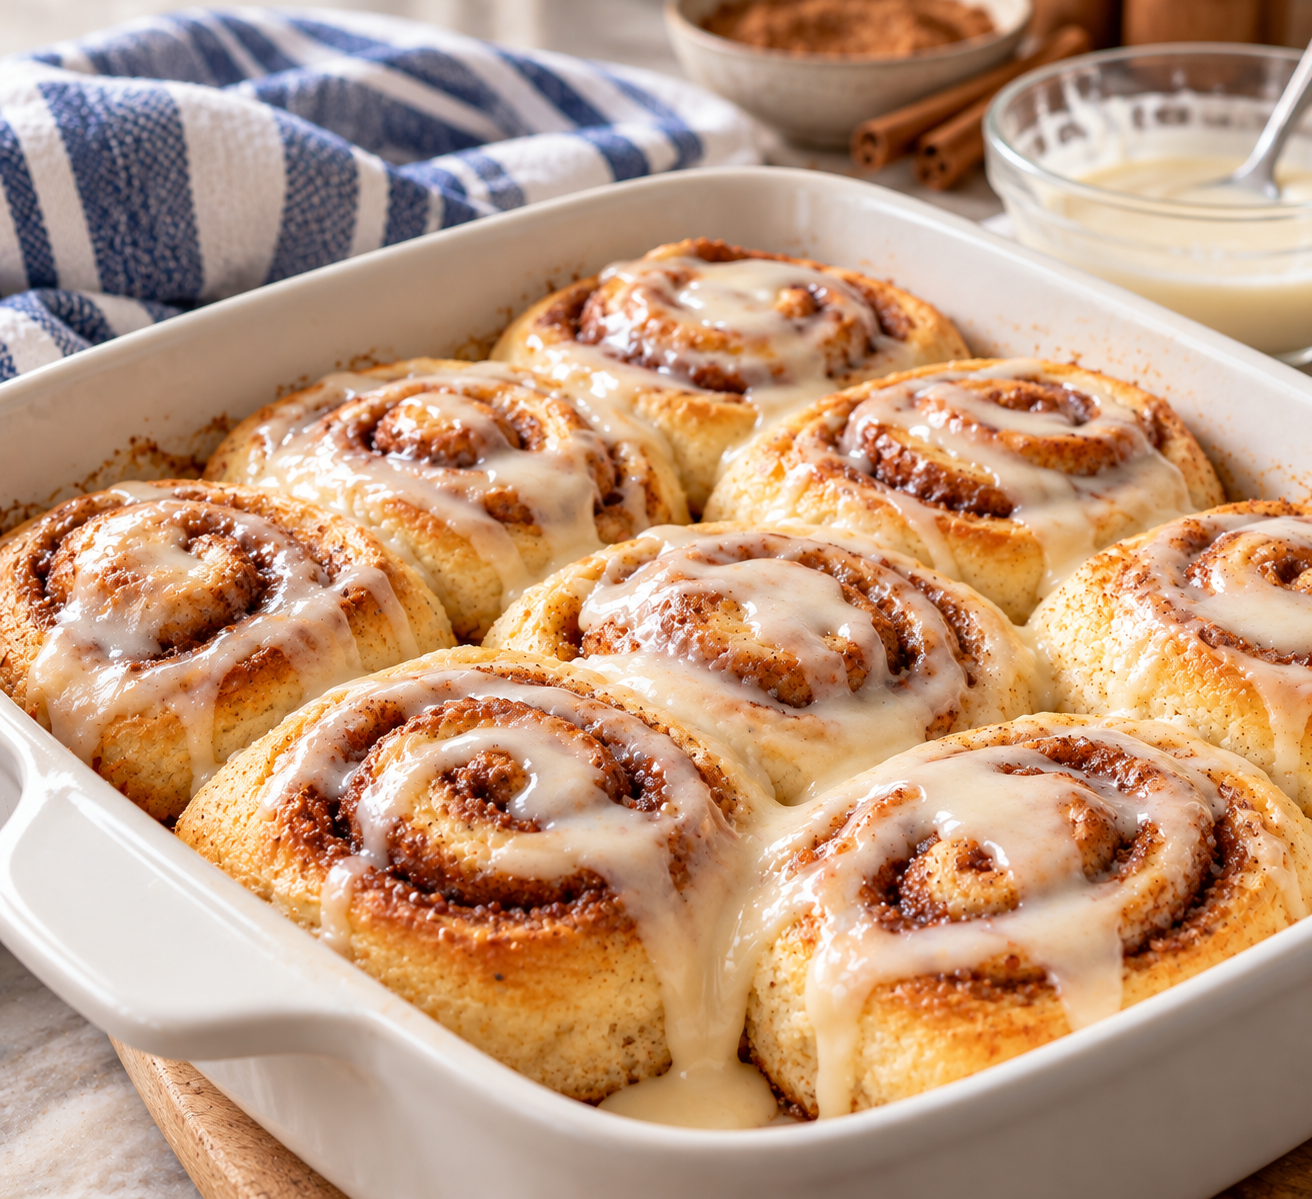
This version uses baking powder and baking soda instead of yeast, with Greek yogurt to bring the dough together. Roll it out, brush it with melted butter, add brown sugar and cinnamon, then roll, slice, and bake.
There’s no yeast and no rising time to wait through. Just a simpler way to make cinnamon rolls when the craving strikes.
In a mixing bowl, combine the flour, baking powder, and baking soda.
2. Add the yogurt and milk.
Add the Greek yogurt and 2 tablespoons of milk to start. Knead the mixture until a smooth dough forms, adding the remaining milk a little at a time as needed to bring the dough together.
3. Roll out the dough.
On a lightly floured surface, roll the dough into a rectangle about ¼ inch thick.
4. Add the butter and cinnamon-sugar filling.
Brush the melted butter over the rolled-out dough. Sprinkle the brown sugar and cinnamon evenly across the surface.
5. Roll and slice.
Roll the dough into a log, then cut it into approximately 8–10 rolls.
6. Arrange in a baking dish.
Place the rolls in a greased baking dish, leaving a little space between them.
7. Bake.
Bake uncovered at 350°F for 20–25 minutes, until the rolls are cooked through and lightly golden.
8. Make the glaze.
While the rolls bake, whisk together the powdered sugar, vanilla, and 1 teaspoon of milk. Add the remaining milk as needed to reach a consistency you can drizzle over the rolls.
9. Drizzle and serve.
When the rolls come out of the oven, drizzle the glaze over the top. Serve warm.
Why We Like This Shortcut
Traditional cinnamon rolls made with yeast can be wonderful, but they take more time because the dough needs to rise.
This version skips that waiting period. The Greek yogurt, flour, baking powder, and baking soda make a different kind of dough, but the process is straightforward and the cinnamon-sugar filling gives you the familiar flavor that makes cinnamon rolls so appealing.
It’s a good option for a weekend breakfast or a sweet treat when you don’t want to plan hours ahead.
The Little Things That Matter
A few simple details help this recipe come together:
Add the milk gradually. Start with 2 tablespoons and add more as needed until the dough comes together smoothly.
Roll the dough evenly. Aim for about ¼ inch thick so you can spread the filling and roll it into a log.
Leave a little space between the rolls. They’ll have room to bake in the dish.
Glaze while warm. Drizzling the glaze over the rolls as soon as they come out of the oven gives you that sweet finish without another complicated step.
The Worth It Test
★★★★☆ Worth it, with caveats.
These cinnamon rolls are worth trying when you want a homemade cinnamon-roll treat without the time commitment of yeast dough.
The biggest advantage is convenience: no yeast, no rising time, and a short list of everyday ingredients. The trade-off is that this is a shortcut-style dough, so the texture won’t be exactly the same as traditional yeast cinnamon rolls.
For a quicker homemade option that still delivers cinnamon, brown sugar, butter, and sweet glaze, that’s a trade-off worth considering.
And sometimes, the best recipe is the one that makes a little treat possible on an ordinary morning.
Sometimes you want homemade cookies without the time, mess, and long ingredient list that can come with baking from scratch.
That’s where these cake-mix cookies come in.
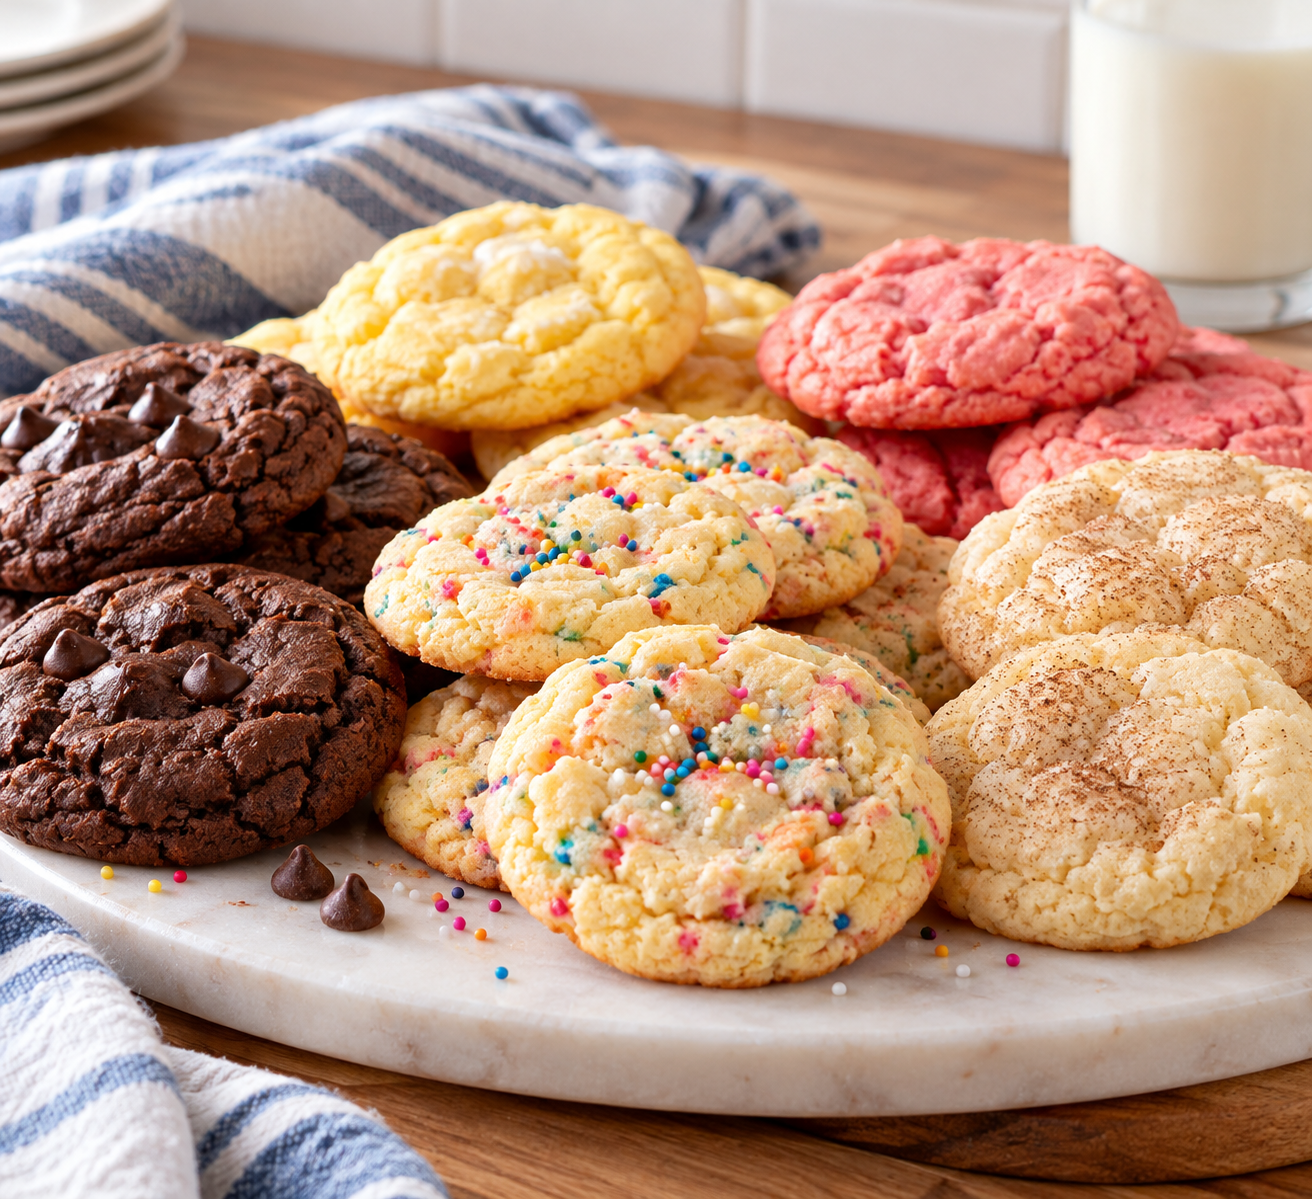
They’re one of those easy recipes that make you wonder why you ever needed a complicated cookie recipe in the first place. You need just three ingredients: a box of cake mix, two eggs, and melted butter.
The best part? You can change the flavor simply by changing the cake mix.
No complicated prep. No chilling the dough. Just mix, scoop, and bake.
That’s it. Three ingredients, and you’re ready to make cookies.
How to Make Them
1. Preheat the oven.
Preheat your oven to 350°F and prepare a baking sheet.
2. Mix the ingredients.
Combine the cake mix, eggs, and melted butter in a bowl. Mix until a cookie dough forms.
3. Scoop onto the baking sheet.
Scoop the dough directly onto your prepared baking sheet. There’s no need to chill the dough first, which makes this recipe especially convenient when you want cookies without a lot of planning.
4. Bake.
Bake for 9–11 minutes at 350°F.
Look for edges that are set and just beginning to turn light brown. The cookies should feel a little firm, but you don’t want to leave them in the oven until they’re hard.
5. Cool according to how they’re baking.
This is where a little experience helps. If the cookies look like they’re already a little more done than you wanted, move them off the hot baking sheet right away. If they need a little more time to set, leave them on the pan for a few minutes before transferring them.
Keep in mind that the hot baking sheet will continue cooking the bottoms after the pan comes out of the oven.
Change the Flavor, Keep the Easy Recipe
One of my favorite things about this recipe is how easy it is to change.
Choose a different cake-mix flavor, and you’ve got a different cookie without learning a new recipe. It’s an easy way to experiment with flavors while keeping the same three-ingredient foundation.
It’s also a good recipe to keep in mind when you want to bring cookies to a gathering, make a quick treat for the family, or satisfy a sweet craving without a big baking project.
Why We Love This Shortcut
Not every homemade treat needs to start with flour, sugar, baking powder, and a long list of ingredients.
Sometimes, a shortcut makes sense.
Using cake mix cuts down on measuring and keeps the ingredient list short. The eggs and melted butter turn it into cookie dough, and the different cake-mix flavors give you plenty of ways to change things up.
It’s simple, flexible, and approachable—even if baking isn’t usually your thing.
The Worth It Test
★★★★★ Absolutely worth it.
These cookies earn their place in our recipe rotation because they’re inexpensive to make, easy to customize, and don’t require much time or effort.
Three ingredients. One bowl. No chilling. Less than 15 minutes in the oven.
They may not be an elaborate, made-from-scratch bakery cookie, but that’s not what we’re going for here. We’re looking for an easy homemade treat that tastes good without turning the kitchen into a project.
And sometimes, that’s exactly what’s worth the making.
Our Easy Chicken or Beef Enchiladas: The Sauce-and-Cheese Trick We Love
Some dinners don’t need a complicated recipe to make everyone happy. In our house, enchiladas are one of those meals that feel hearty, comforting, and worth the little bit of effort it takes to put them together.
We keep things simple. We use fresh rotisserie chicken when we want an easy shortcut, or ground beef when that’s what sounds good. We make Spanish rice separately, grab a can of red enchilada sauce, and build each enchilada with meat, rice, and cheddar cheese.
But the part I wouldn’t skip? Dipping the flour tortillas in enchilada sauce before filling them, then covering the finished enchiladas with even more sauce and plenty of cheese.
It’s not fancy, and it doesn’t require making everything from scratch. It just works for us.
Our Easy Enchilada Recipe
Prep time: Approximately 20 minutes, depending on your filling Cook time: About 30 minutes Oven temperature: 350°F Difficulty: Easy
Ingredients
Flour tortillas
1 fresh rotisserie chicken, picked up the day you plan to make the enchiladas, or ground beef
Spanish rice, prepared separately
Shredded cheddar cheese for the filling
1 can or more of red Old El Paso enchilada sauce, as needed to coat the tortillas and cover the finished enchiladas
1 bag (8 ounces) shredded cheddar cheese for the topping
4–8 ounces shredded mozzarella cheese for the topping
You’ll also need a baking dish.
The amount of sauce, filling, and cheese you need will depend on how many enchiladas you make and the size of your baking dish. We use enough sauce to cover the enchiladas completely and don’t skimp on the cheese.
How to Make Them
1. Prepare the filling.
If you’re using rotisserie chicken, remove the meat from the chicken and shred or chop it into bite-sized pieces.
If you’re using ground beef, brown it in a skillet and drain the grease. We don’t add extra seasoning because the enchilada sauce and Spanish rice bring plenty of flavor.
Prepare the Spanish rice separately according to its package directions or your usual method.
2. Get your assembly station ready.
Set out your flour tortillas, prepared meat, Spanish rice, cheddar cheese, and a plate with some of the red enchilada sauce poured onto it. Have your baking dish ready, too.
This makes assembly easier because you can fill and roll each tortilla without stopping to gather ingredients.
3. Dip each tortilla in enchilada sauce.
Take a flour tortilla and dip it into the sauce on the plate, coating it before adding the filling.
This is one of our favorite steps because the sauce gets onto the tortilla before everything is rolled together.
4. Fill and roll the enchiladas.
Add some meat, Spanish rice, and cheddar cheese to the tortilla. Wrap it up and place it seam-side down in your baking dish.
Repeat with the remaining tortillas until you’ve filled the dish.
5. Cover everything with more sauce and cheese.
Pour more red enchilada sauce over the assembled enchiladas until they’re completely covered.
Sprinkle the top with the 8-ounce bag of shredded cheddar cheese, followed by approximately 4–8 ounces of mozzarella.
This is not the time to be shy with the cheese. The combination of cheddar and mozzarella gives the top a delicious, cheesy finish.
6. Bake uncovered.
Place the baking dish in a preheated 350°F oven and bake uncovered for about 30 minutes, or until the cheese is melted and the edges of the tortillas are crispy.
Keep an eye on them toward the end, since ovens and baking dishes can affect how quickly the edges brown.
7. Serve and enjoy.
Serve the enchiladas warm. Since the Spanish rice is already inside, you’ve got a hearty meal in every tortilla.
Yield: 6–8 enchiladas Prep time: About 20 minutes Cook time: About 30 minutes Oven temperature: 350°F
Why We Keep This Recipe Simple
You could make enchilada sauce from scratch, season the meat with a long list of spices, and spend extra time preparing every component.
But we don’t find that necessary for this version.
A fresh rotisserie chicken makes dinner easier on a busy day. Ground beef works just as well when that’s what we have planned. The rice and sauce contribute plenty of flavor, and the cheese brings everything together.
It’s a good reminder that cooking a satisfying meal doesn’t mean every ingredient has to be homemade.
Sometimes the shortcut is worth taking.
The Little Technique That Makes a Difference
The sauce does double duty in this recipe.
First, we dip each flour tortilla in enchilada sauce before adding the filling. Then, after the enchiladas are rolled and arranged in the baking dish, we pour on more sauce until they’re covered completely.
The cheese goes on last: cheddar, followed by mozzarella.
That combination is what makes these enchiladas our kind of comfort food. They’re saucy, cheesy, filling, and easy enough to make without turning dinner into an all-day project.
And baking them uncovered gives the edges a chance to crisp up, which is one of our favorite parts.
Make It Your Own
This recipe is flexible enough to work with what you have.
Use rotisserie chicken when you want to save time, or brown some ground beef if that’s what you prefer. Adjust the number of tortillas to suit your family, and use enough sauce and cheese to cover the dish the way you like it.
You don’t need a complicated recipe with perfectly measured amounts for every ingredient. Start with a simple method, pay attention to what your family enjoys, and make it your own.
The Worth It Test
★★★★★ Absolutely worth it.
These enchiladas earn their place in our dinner rotation because they’re comforting, adaptable, and straightforward to prepare.
The rotisserie chicken shortcut saves time. Ground beef is easy to prepare. The sauce and rice add plenty of flavor without extra seasoning, and the cheddar-mozzarella topping makes the whole dish feel generous and satisfying.
It’s not about doing everything from scratch. It’s about knowing which parts matter to you and making a good meal without making dinner harder than it needs to be.
Our French Toast Trick: The Simple Ingredient That Makes It Better
Some weekend mornings call for something a little sweeter than the usual breakfast. French toast is one of our favorites because it’s easy, uses ingredients we usually have on hand, and makes an ordinary morning feel a little more special.
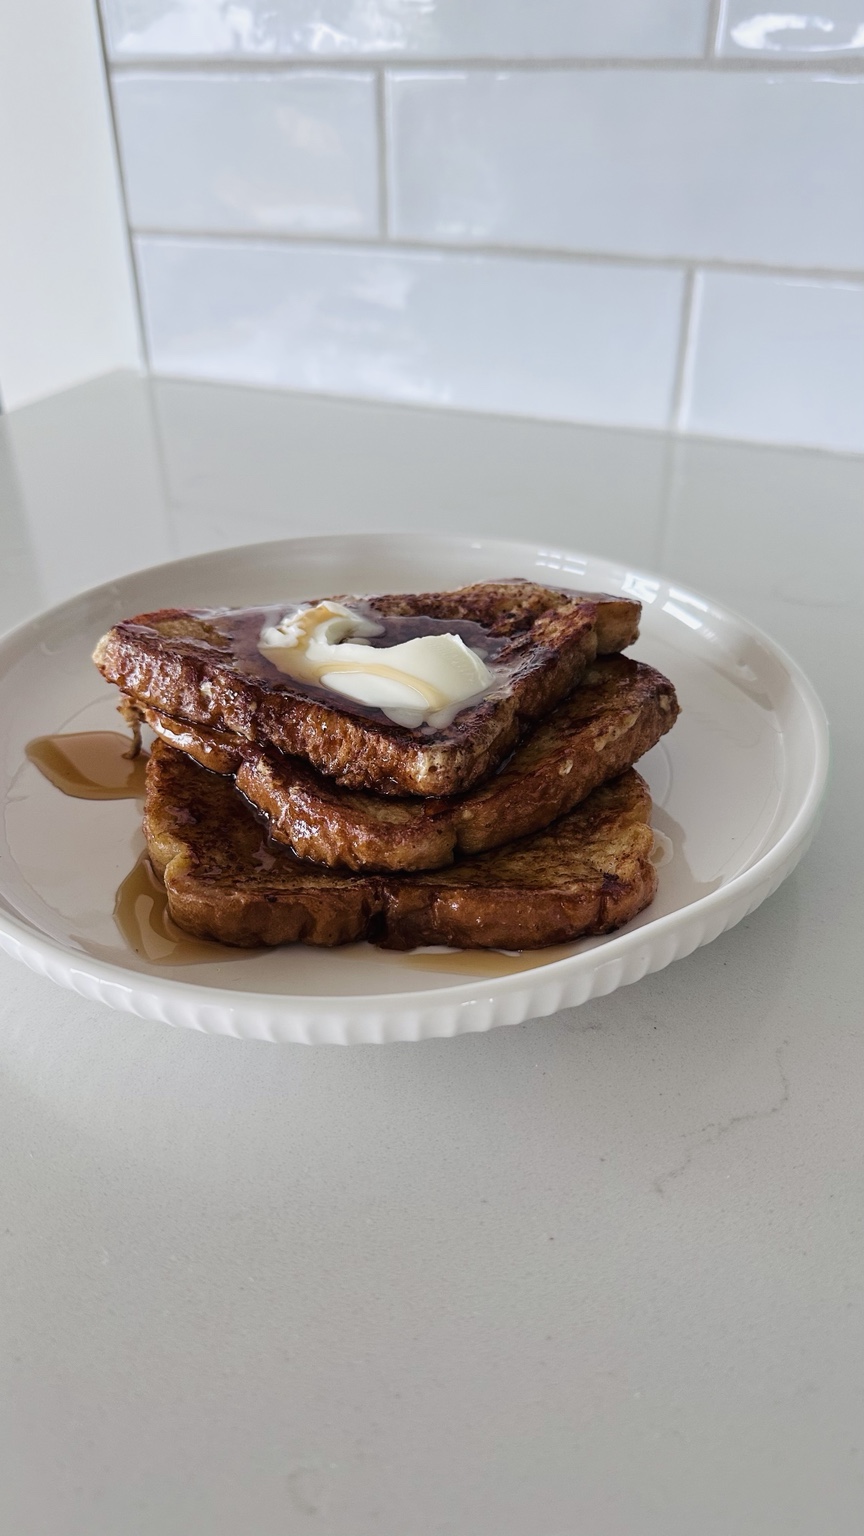
Our little trick? We add maple syrup directly to the egg mixture.
It’s a small change, but it adds sweetness throughout the French toast—not just on top. With cinnamon, half-and-half, and a little butter in the skillet, you have a simple breakfast that feels like a treat without a complicated recipe.
Our Easy French Toast Recipe
Prep time: 5 minutes Cook time: Approximately 10–15 minutes Yield: About 4–6 slices
Ingredients
3 eggs
½ cup half-and-half
1 tablespoon maple syrup
1 teaspoon cinnamon
4–6 slices of bread, depending on thickness
Butter for frying
For serving:
Butter
Maple syrup
Fresh fruit
Whipped cream
How to Make French Toast
1. Whisk together the egg mixture.
In a shallow bowl, whisk the eggs, half-and-half, maple syrup, and cinnamon until combined.
2. Dip and briefly soak the bread.
Dip each slice of bread into the mixture, coating both sides, and let it soak briefly so it absorbs some of the mixture. Use whatever bread you have on hand. Thicker slices may need a little longer than thinner ones.
3. Cook in butter.
Heat a skillet over medium heat and melt a little butter. Place the dipped bread in the skillet and cook until golden brown. Flip and cook the other side until evenly browned and the egg mixture is cooked through.
The trick is to avoid turning the heat up too high. If the outside browns before the middle is cooked, lower the heat and give it a little more time.
4. Add your favorite toppings.
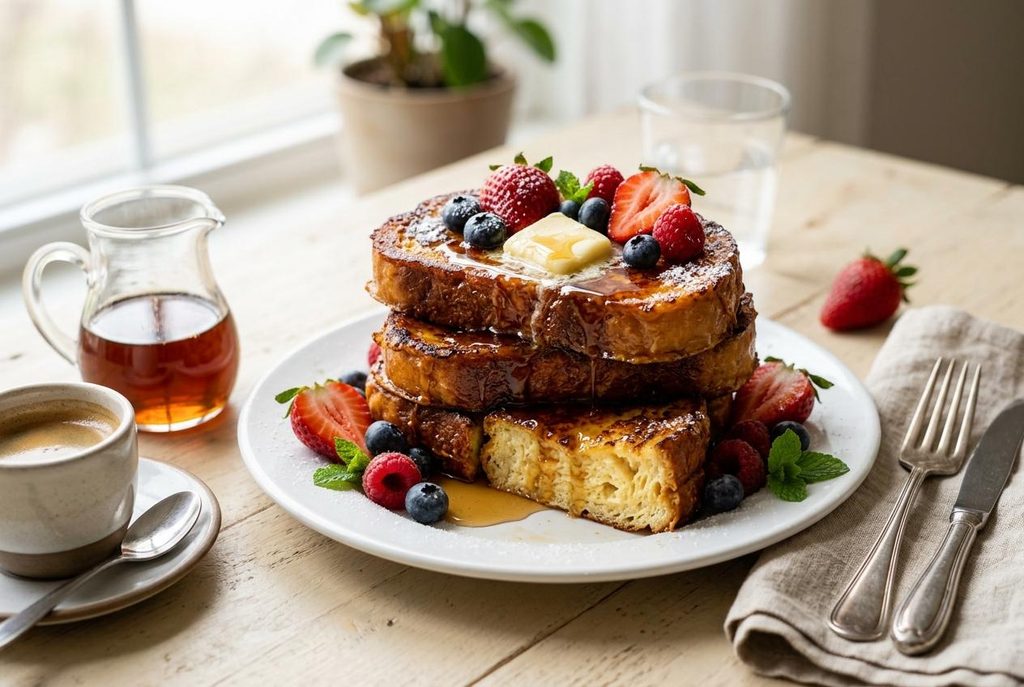
Serve warm with butter and maple syrup. Fresh fruit and whipped cream make it feel extra special, but the toppings are entirely up to you.
That’s it. No special equipment, no complicated ingredients, and no need to make a grocery trip just for breakfast.
The Little Trick That Makes It Better
Maple syrup usually goes on French toast after it’s cooked. We add a tablespoon to the egg mixture, too.
That little bit of sweetness becomes part of the French toast itself, while the syrup on top adds another layer of flavor.
It’s not a complicated cooking technique or a secret ingredient you have to track down. It’s just a small adjustment to a breakfast we already love.
And sometimes, those are the changes worth keeping.
Use What You Have
One of the things we appreciate about this recipe is its flexibility. You don’t have to buy a special loaf of bread to make good French toast.
Use what’s already in the kitchen. The cooking time may vary depending on the thickness and type of bread, so pay attention to how it’s browning and make sure the center cooks through.
Serve it with whatever fruit you have, add whipped cream if you’re in the mood, or keep things simple with butter and syrup.
You don’t have to turn every weekend breakfast into an event. But when you’re craving something sweet, a few everyday ingredients can go a long way.
The Worth It Test
★★★★★ Absolutely worth it.
This recipe earns its place in our weekend rotation because it delivers something special without asking much in return.
The ingredients are simple, the preparation is easy, and the maple syrup trick takes almost no extra effort. Best of all, you can use the bread you already have instead of making a special trip to the store.
It’s not about creating the fanciest breakfast. It’s about taking something simple and making it a little better.
We took my dad to Yellowstone for his 81st birthday to help him experience a place he’d always dreamed of seeing. We came home with incredible memories, a new appreciation for America’s national parks, and a few things we’d do differently next time.
Some trips are about getting away. Others are about seeing somewhere new, checking a destination off your list, or finally visiting a place you’ve heard about for years.
And then there are the trips you take because someone you love has always dreamed of going somewhere.
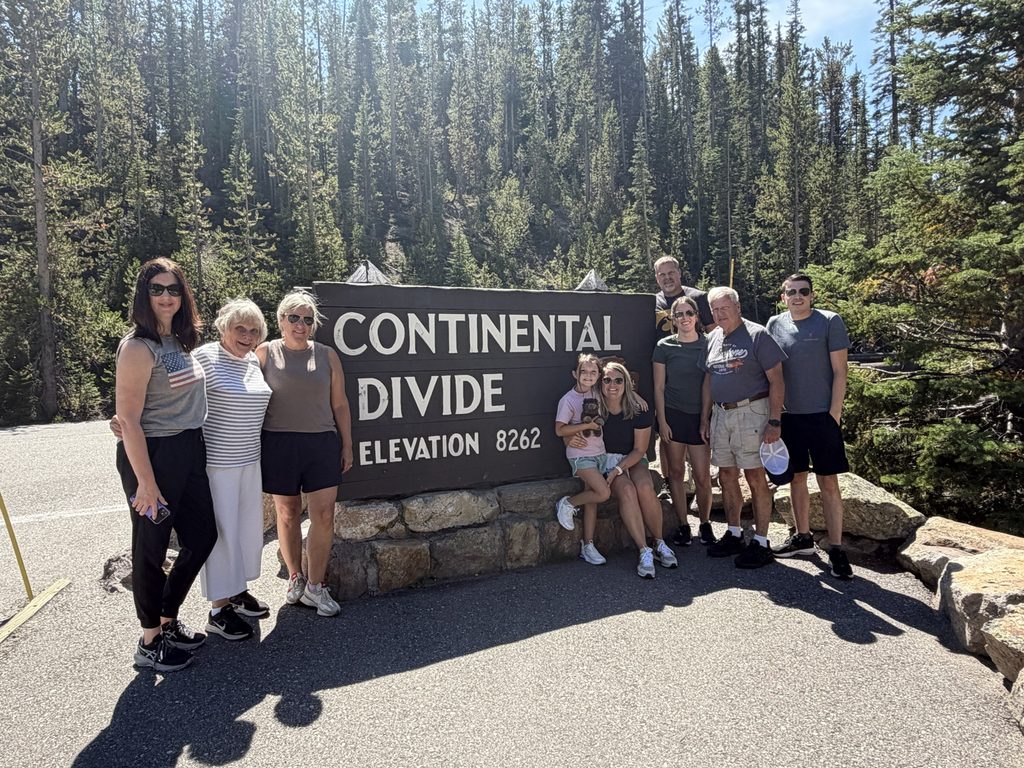
For my dad, Jerry, that place was Yellowstone National Park.
For his 81st birthday, our family decided it was time to make that dream happen. My mom, my brother and his family, my sister, my daughter Ryli, and I traveled west for a few days of exploring Yellowstone and Grand Teton National Park.
We saw waterfalls, wildlife, mountains, and landscapes that were almost hard to believe were real. We learned about the area’s remarkable geology, took a scenic boat tour, and enjoyed an Old West wagon ride and dinner.
But when I look back on the trip, what stands out most isn’t a particular attraction or even the breathtaking scenery.
It’s watching my dad experience a place he’d wanted to see for so long.
And that made the trip worth it before we even started calculating what it cost.
Getting There: A Family Trip to Remember
Our trip took place August 20–25, 2026.
We flew into Denver, caught a connecting flight to Bozeman, Montana, and had dinner in Bozeman before driving to our Vrbo near Yellowstone’s West Entrance in Island Park, Idaho.
We shared a vacation rental and coordinated transportation and activities across three families. Traveling with extended family takes planning, but splitting some of the larger expenses made the trip more manageable.
Having a home base near the park also worked well for us. We could make breakfast at the cabin, pack simple lunches, and spend our days exploring without having to eat every meal at a restaurant.
We spent Friday and Saturday exploring Yellowstone, then headed to Grand Teton National Park on Sunday. Monday was our drive back to Bozeman, where we stayed overnight before catching an early flight home Tuesday morning.
It was a full few days, but we managed to experience two incredible national parks in one trip.
The Beauty of Yellowstone Is Hard to Put Into Words
I’ve seen plenty of pictures of Yellowstone over the years, but seeing it in person is an entirely different experience.
The waterfalls were among our favorite sights. There’s something about seeing the sheer volume of water moving through the landscape that photographs don’t quite capture.
The wildlife was another highlight. Seeing animals in their natural surroundings, against a backdrop of mountains and wide-open scenery, reminded us just how extraordinary the natural world can be.
And then there were the mountains.
Everywhere we looked, there was something else to take in: the terrain, the colors, the water, and the sheer scale of the landscape.
Yellowstone was also fascinating from a geological perspective. The park sits above a vast volcanic system, and its geothermal features are part of what makes it so unique. Knowing that volcanic activity helped shape the landscape adds another layer to the experience.
It’s not simply beautiful. There’s a remarkable amount of history and natural science behind what you’re seeing.
You can spend your time admiring the scenery, or you can dig into the reasons it looks the way it does. We enjoyed both.
But the best part was watching my dad take it all in.
He was surrounded by the natural beauty he’d wanted to experience for years. Seeing how much he loved being there made the trip feel bigger than a vacation.
We weren’t just visiting Yellowstone. We were helping someone we love realize a dream.
And that’s a pretty special reason to go anywhere.
A Day at Grand Teton National Park
We didn’t limit the trip to Yellowstone.
On Sunday, we made the drive to Jackson, Wyoming, and visited Grand Teton National Park.
The Teton landscape offers a different kind of beauty. The mountains rise dramatically above the surrounding terrain, creating a backdrop that’s difficult to forget.
One of the highlights was our scenic boat tour on Jenny Lake.
Getting out on the water and seeing the mountains from that perspective was a wonderful experience. It gave us time to slow down, enjoy the scenery, and appreciate where we were.
The boat tour was absolutely worth doing.
There was just one thing I’d change about this part of the trip: I’d plan more time in Jackson.
We barely got to experience the town. We drove through, grabbed coffee, and headed to our boat tour. That was about it.
I’d love to go back, spend time walking around Jackson, explore the shops and restaurants, and enjoy the area without feeling like we were squeezing everything into one day.
If I were planning this trip again, I’d seriously consider staying in the Jackson or Jackson Hole area longer. I’d give Grand Teton another full day and make time to enjoy the town itself.
Sometimes the things you don’t have time to do become the best ideas for your next trip.
The Old West Wagon Ride and Dinner
Another memorable experience was the Old West wagon ride and dinner cookout offered through Yellowstone National Park Lodges.
This combined a horse-drawn wagon ride through Pleasant Valley with a western-style dinner. It gave us something different from our days of exploring the parks and added another experience to the trip.
If you’re planning a Yellowstone visit, it’s worth looking into the activities available beyond the main scenic stops. Just be sure to check schedules, availability, and pricing when planning your own trip.
A trip to Yellowstone isn’t just the cost of getting into the park. You have to consider flights, lodging, transportation, food, activities, and all the little expenses that add up along the way.
Because we traveled with extended family, some expenses were split among three families. That helped make a trip of this size more manageable.
For this breakdown, I’m focusing on the estimated expenses for me and my daughter, Ryli—not the entire group’s expenses.
Our estimated expenses for two
Expense
Estimated cost
Round-trip flights for two
$703.20
Our share of the Vrbo
$1,227.33
Our share of the rental car
$133.33
Yellowstone entrance fee
$35.00
Grand Teton entrance fee
$35.00
Jenny Lake boat tour for two
$42.00
Old West wagon ride and dinner for two
$168.39
Food and groceries
$200–$250
Estimated total
$2,544.25–$2,594.25
Our vacation rental cost $3,682 for the stay, divided among three families. The rental car cost approximately $400, also divided among the three families.
Our food costs are estimates. We made breakfast at the cabin, picked up sandwiches and other simple lunches while exploring, ordered pizza one night, and ate dinner out in Bozeman when we arrived and before heading home. We also made room for ice cream along the way.
Gas was paid for by my sister, so it isn’t included in our personal total. We also had a few small souvenir purchases that aren’t included in the estimate.
This isn’t a perfect accounting of every dollar, but it gives us a reasonable picture of what the trip cost for two people.
Our estimated expenses came to about $2,550–$2,600 for me and Ryli, before gas, souvenirs, and other small expenses.
That’s a meaningful amount of money. But the question isn’t whether the trip was inexpensive. It’s whether the experience was worth what we spent.
What We’d Do Differently Next Time
Even though we loved the trip, there are a few things I’d approach differently if I were planning it again.
I’d spend more time in Jackson.
We barely scratched the surface. I’d like to explore the town, enjoy the shops and restaurants, and experience more of the Jackson Hole area.
I’d give Grand Teton another day.
The boat tour was a highlight, and I would have loved more time to explore the park without feeling rushed.
I’d explore more of Montana.
I really liked the Bozeman area. It had a character that made me want to see more of it, and I’d happily plan another trip focused on exploring Montana.
As for Yellowstone itself, I feel like we saw so much of the park that I don’t necessarily feel the need to return just to do it all again.
That doesn’t mean I wouldn’t recommend going. Quite the opposite.
I think Yellowstone is a trip everyone should experience if they have the opportunity. Its natural beauty, wildlife, waterfalls, and geology make it a remarkable place to visit.
But I also believe that not every wonderful destination needs to become a place you return to repeatedly.
Sometimes the value is in experiencing it once, appreciating it fully, and moving on to the next adventure.
This trip also sparked something new for me: a desire to visit all of America’s national parks.
I’d love to see more of them, discover what makes each one unique, and experience more of the incredible landscapes this country has to offer.
In a way, Yellowstone didn’t just fulfill one dream for my dad. It started a new one for me.
The Worth It Test: Was Yellowstone Worth It?
At Worth the Making, we’re interested in a simple question: Is something worth the time, money, and effort it takes to make it happen?
For our family, Yellowstone absolutely passes that test.
Was it worth the money?
Absolutely. It was a significant expense, but sharing lodging and transportation costs helped. More importantly, the money paid for an experience we couldn’t recreate at home.
Was it worth the time?
Yes. We spent several days traveling, exploring, and experiencing two extraordinary national parks. We could have filled those days with other things, but this was time spent doing something meaningful together.
Was it worth the effort?
Yes. Traveling with a large family group takes coordination. There were flights, rental cars, schedules, meals, and activities to manage.
But the effort helped make an important birthday dream come true.
Would we do it again?
I’d absolutely recommend the trip to others.
Personally, I don’t feel a strong need to revisit Yellowstone itself, because I feel we experienced so much of what we wanted to see. But I’d return to the broader region in a heartbeat.
I’d spend more time in Grand Teton, explore Jackson properly, and discover more of Montana.
And I’d happily keep working toward my new goal of visiting all the national parks.
Our rating: ★★★★★ Absolutely worth it
Not because the trip was cheap. Not because we managed to see every attraction. And not because every part of the itinerary was perfect.
It was worth it because we experienced extraordinary natural beauty, spent meaningful time with family, and watched my dad enjoy a place he’d dreamed of visiting for years.
Those are the experiences that stay with you long after you’ve unpacked your suitcase.
Some Trips Are Worth Taking for Someone Else
When I think about Yellowstone, I think about the waterfalls, wildlife, mountains, and incredible beauty of the landscape.
I think about the boat tour at Jenny Lake, the Old West dinner, and the places I’d like to explore next time.
But more than anything, I think about my dad.
We took this trip because Yellowstone was somewhere he’d always wanted to see. Getting to watch him experience that natural wonder was one of the best parts of the entire trip.
That’s something a price comparison can’t measure.
The trip cost money. It took planning. It required time and effort.
And I’d do it again.
Because sometimes the best reason to take a trip isn’t to check a destination off your list or get the most out of every dollar.
Sometimes it’s to help someone you love experience something they’ve always wanted to see.
And sometimes, that’s what makes it worth the making.
Creating a home that feels stylish, comfortable, and unmistakably you.
I want people to walk into our home and think two things: This is stylish. And I could get comfortable here.
I love when someone notices a piece of decor and says, “Oh, that’s cute. I want that at my house.” But I also want them to feel at home—to relax, pull up a chair, grab something to eat, and stay awhile.
For me, those things go together. A home can be thoughtfully decorated without feeling untouchable. It can look put together without feeling like nobody is allowed to live in it.
And creating that feeling doesn’t always require buying something new.
Sometimes, it comes down to understanding what you want your home to feel like and making intentional choices that support it.
Start With the Feeling, Not the Shopping
Before thinking about furniture, throw pillows, seasonal decor, or the latest home trend, I think it’s worth asking a different question:
How do I want people to feel when they walk through my door?
For me, the answer is comfortable, peaceful, and welcome—with a little style mixed in.
I want our home to feel like us. I want the spaces to look cohesive, but I also want people to see pieces that have meaning and tell a little of our story.
That means our home isn’t built around one particular trend. Our style leans organic modern, with clean lines and nostalgic pieces that mean something to us.
Other people might love antique country, dark traditional rooms, bold colors, or something completely different. None of those styles is automatically more welcoming than another.
The point is knowing yourself well enough to create a space that feels authentic.
When your home reflects who you are, it feels less like a room you’ve decorated for other people and more like an invitation into your life.
Light Can Change the Entire Mood of a Room
During the day, we have big windows that let natural light into the house. I love having that sunshine fill the space.
At night, I take a different approach. Instead of relying on bright overhead lighting everywhere, I prefer soft lighting from lamps and side lights. It creates a calmer feeling and makes the space feel more relaxed.
It’s a small distinction, but it changes how a room feels.
You don’t necessarily need new fixtures or an expensive lighting makeover to try it yourself. Start with what you already have. Open the curtains during the day. Turn on a lamp in the evening. Notice how the room feels when you change the lighting.
Sometimes, the simplest adjustment makes a space feel more inviting.
Don’t Underestimate the Little Things You Notice With Your Senses
A welcoming home isn’t only about what you see.
I use a diffuser with essential oils to bring seasonal scents into our home. It’s one of the ways I like to make the atmosphere feel right for the time of year.
Music is another part of it. We change things up depending on the mood, but our usual mix includes country, music from the ’80s and ’90s, and soft rock.
These aren’t complicated design decisions. They’re simply things that make the house feel like ours.
You might prefer a favorite candle, a playlist you always have on in the background, fresh flowers, or the smell of something cooking in the kitchen. You might prefer a quiet house with no added fragrance or music at all.
There isn’t one right answer.
The idea is to pay attention to the details that make you and the people around you feel comfortable.
Make Room for People to Actually Live There
For us, food has always been an important part of bringing people together. Some of my favorite parts of having people over happen around a meal, whether we’re sitting at the dining table, gathering around the big kitchen island, or settling into the living room.
That’s one reason the layout of our home matters to me.
Our main living area has an open floor plan connecting the living room, dining area, and kitchen. It gives people room to spread out while still feeling like they’re part of the same gathering.
We also have a large living room in the basement, and we’re renovating it to include a bar area. That will give us another place to gather and more room when we have people over.
The common thread isn’t a particular floor plan or a certain amount of square footage. It’s thinking about how you actually use your home.
Do people have somewhere comfortable to sit? Can they join a conversation without feeling separated from everyone else? Is there room to share a meal, watch a game, or simply spend time together?
A beautiful room is one thing. A room that makes it easy to enjoy being together is something else entirely.
When you’re deciding what your home needs, consider the experiences you want to create before deciding what to buy.
Sometimes, Buying the Right Thing Is Worth It
The idea of creating a welcoming home without buying more stuff doesn’t mean never spending money on your home.
Sometimes, the right purchase makes a meaningful difference.
One thing we’ve learned is how much it matters to choose furniture with the whole space in mind.
In our previous home, we purchased furniture in a more fragmented way. We chose individual pieces, but they didn’t always work together as one cohesive area.
When we chose furniture for our current space, we spent more time considering how everything would fit together. Because our main living area is open, we wanted the furniture to feel connected rather than like separate rooms that happened to sit next to one another.
That planning helped us create the feeling we wanted.
For us, that was worth the extra thought and effort. Instead of simply buying something because we liked it on its own, we considered how it would work with everything around it.
That’s an approach you can use whether you’re furnishing an entire room or adding one small piece.
Before making a purchase, ask yourself:
Does this work with what I already own?
Does it support the way I use this space?
Do I genuinely love it, or do I just like the idea of having it?
Will it help create the feeling I’m trying to achieve?
Sometimes, the answer will be yes, and the purchase will be worth it. Other times, you may realize that what you already have is enough.
Both are good outcomes.
The Pieces That Make a House Feel Like Yours
Some of the most meaningful things in our home aren’t things we bought to decorate a room. They’re things that were already part of our story.
On our buffet, we have Brian’s family Bible, which has been passed down through his family, and a gameboard that belonged to his grandma. We paired them with a modern buffet, a lamp, and a small Sonos stereo. The furniture gives the space a clean, modern look, while those family pieces bring history and meaning into the room.
When we chose what would sit on that buffet, we didn’t just look for things that matched. We chose things that meant something to us.
Those pieces bring a sense of history into a room that might otherwise feel entirely new. They remind us that a home can reflect both the style we love today and the people and traditions that came before us.
I love that combination. The modern pieces reflect the style we enjoy, while the nostalgic ones connect our home to the people and memories that helped shape our lives.
And I think that’s an important part of making a home feel welcoming. It doesn’t have to look like everything came from the same store or was chosen to match a particular trend. Sometimes, the pieces that mean the most are the ones that have been with your family for years.
You can have clean lines and modern furniture alongside family heirlooms, collected treasures, and things that might not fit a traditional decorating formula. When those pieces have meaning, they help tell your story.
Your home should look like you, but it should also hold a little of where you’ve come from.
That’s what makes it personal. And to me, that’s worth keeping.
A Few Ways to Make Your Home Feel More Welcoming Today
You don’t need a renovation budget or a shopping trip to start making your home feel more inviting.
Here are a few things worth trying:
Let in the natural light. Open the curtains and see how the room feels with more daylight.
Change the lighting after dark. Try lamps or side lights for a softer, more relaxed atmosphere.
Put on music you enjoy. Let your home sound like you, whether that’s country, classic rock, jazz, or something else entirely.
Clear space for people. Move things around if needed so there’s room to sit, talk, eat, or gather comfortably.
Bring out something meaningful. A sentimental object, a family photograph, or a piece you’ve had for years can add more personality than another trendy accessory.
Think about how you use the room. If everyone gathers in the kitchen, make that space comfortable. If you love hosting movie nights or watching the game, make room for that.
Pause before buying something new. Ask whether it solves a real problem or supports the feeling you’re trying to create.
None of these ideas requires a perfect home. They’re simply ways to be more intentional with the space you already have.
The Worth It Test
Does making your home more welcoming require buying more things?
Not necessarily.
Sometimes, a purchase is worth it because it improves how a room functions or helps bring a space together. Sometimes, the better choice is to rearrange what you own, change the lighting, make a meal, or create more room for people to gather.
For me, the goal isn’t to have a home that looks perfect. It’s to have a home that feels like us—and where the people we care about feel comfortable being themselves, too.
If a new purchase helps you create that feeling, it may be worth it. If you’re buying something simply because you think your home needs to look like everyone else’s, it may be worth reconsidering.
The best home isn’t necessarily the one with the most stuff. It’s the one that feels right for the life you’re living.
Because a welcoming home isn’t just something you decorate.
Worth it doesn’t mean cheap. It doesn’t mean expensive. And it definitely doesn’t mean everyone else thinks it’s worth it.
For us, worth it is a much simpler question:
Did it make the time, money or effort we put into it feel worthwhile?
Sometimes the answer is yes.
Sometimes it’s absolutely not.
And sometimes something costs more than we planned, takes longer than we expected or requires more work than we thought it would—but when we’re finished, we’re still glad we did it.
That’s worth it, too.
We started Worth the Making because we think there are a lot of decisions in everyday life that deserve a little more thought than “Is this the cheapest option?” or “Is this what everyone else is doing?”
What should we make for dinner?
Is that purchase actually worth the money?
Is this project worth the time?
Is a weekend trip worth the expense?
Is hosting people at home worth the work?
Sometimes the answer is yes. Sometimes it’s no. And sometimes the answer is it depends.
That’s what we’re here to figure out.
Worth It Isn’t the Same as Cheap
To us, something is worth it when we can look back and say, “I’m glad we did that.”
Maybe it created a memory we’ll talk about for years. Maybe it gave us a feeling we didn’t know we needed. Maybe it brought people together around a table. Maybe it was a trip we’ll still talk about ten years from now.
And sometimes, it’s something as simple as the way a room feels when people walk through the door.
We want our home to feel like a place where people can walk in, take their shoes off, open the refrigerator and make themselves at home. A place where nobody feels like they’re imposing or that everything has to be perfect before they arrive.
Our home is where friends turn into family, where ordinary moments become memories that last lifetimes.
That’s also what we want the things we bring into our home to create.
The decorations we choose aren’t just about making a room look pretty. We want them to create a feeling—peace, calm, warmth and welcome.
The food we make isn’t just about putting dinner on the table. It’s about what happens when people sit down together.
The trips we take aren’t just about seeing somewhere new. They’re about the stories we’ll tell when we get home.
And the celebrations we create aren’t about making everything look perfect. They’re about giving people a reason to gather and making the day feel special.
That’s what worth it means to us.
It’s not necessarily about what something costs. It’s about what it creates.
It’s About Knowing What Matters Most
We don’t think something is a waste of money just because it costs more than the cheapest option. And we don’t think something is automatically worth buying just because it’s beautiful, popular or on sale.
We think it depends on what you’re trying to create.
Take Brian’s birthday party, for example.
We didn’t go out and buy a bunch of decorations or spend money on an elaborate theme. Not because we don’t enjoy decorating—we absolutely do. There are parties where we’ll go all out with the decorations and theme because creating that atmosphere is part of what makes the occasion special.
But for this particular birthday, that wasn’t where we wanted to spend our money.
We wanted good food, a relaxed gathering and time with the people we love. So we put most of our budget toward the food and kept everything else simple.
And it worked.
We didn’t feel like anything was missing because we hadn’t spent money on decorations. We had what we wanted: a house full of people, plenty of food and a reason to spend the day together.
That’s the difference between simply spending less and spending intentionally.
It’s not about asking, “How can we make this cheaper?” It’s about asking, “What matters most to us this time?”
Sometimes the answer will be beautiful decorations. Sometimes it will be a really good meal, a weekend away or a little extra money spent to make someone feel special.
The answer can change from one occasion to the next. That’s okay.
The goal isn’t to spend as little as possible. It’s to spend our time, money and effort on the things that actually make a difference to the experience we want to create.
How We Decide If Something Is Worth It
We don’t have a complicated formula for deciding whether something is worth it. And we don’t think there is one right answer for everyone.
What feels worthwhile to us might look completely different from what matters to someone else.
But there are a few questions we come back to when we’re deciding where to spend our time, money and effort.
1. What Are We Really Trying to Create?
Before we spend money, we try to think about what we actually want from the experience.
If we’re hosting a birthday party, do we want an elaborate theme and beautiful decorations? Or do we want a relaxed afternoon with good food and people we love?
If we’re decorating a room, are we trying to make it look a certain way, or are we trying to create a space that feels peaceful, comfortable and welcoming?
Those aren’t always the same thing.
When we know what we’re trying to create, it’s easier to decide where our money and effort will make the biggest difference.
2. Will It Make the Experience Better?
Not everything that looks good on paper actually makes an experience better.
A more expensive ingredient might make a meal memorable. A thoughtful decoration might completely change the feeling of a room. A carefully planned trip might give us memories we’ll talk about for years.
But sometimes the extra expense doesn’t add much at all.
We try to ask ourselves whether the additional cost, time or effort will genuinely improve the experience—or whether we’re doing it simply because we think we’re supposed to.
3. How Will We Feel About It Later?
This is one of the biggest questions for us.
Will we remember the experience? Will it make someone feel loved or welcome? Will we be glad we made the effort?
Not everything has to create a lifetime memory to be worthwhile. Sometimes the value is in an ordinary Tuesday dinner, a comfortable room at the end of a long day, or a slow morning spent together.
But we want the things we put our resources into to contribute something meaningful to our lives.
4. Is There a Better Place for That Money or Effort?
Every decision involves a trade-off.
Spending more on one thing usually means spending less—or giving up something else—somewhere along the way.
For Brian’s birthday, we chose to spend most of our budget on food instead of decorations. That made sense for the kind of gathering we wanted.
For another celebration, we might make a completely different choice.
The point isn’t to find the cheapest option. It’s to decide what deserves our resources most in that particular moment.
5. Would We Do It Again?
Sometimes we don’t know whether something is worth it until we’ve tried it.
Maybe a purchase doesn’t live up to expectations. Maybe a project takes twice as long as we planned. Maybe a trip costs more than we thought but gives us an experience we’d never trade.
Looking back honestly helps us make better decisions the next time.
Would we do it again? Would we spend the money again? Was the result worth the effort?
And if the answer is no, that’s useful information, too.
Being honest about what wasn’t worth it helps us recognize what is.
The Worth It Test
We don’t think every decision needs a spreadsheet, a pros-and-cons list or hours of research. Sometimes you just need to step back and ask whether something delivered what you hoped it would.
That’s why we created The Worth It Test—a simple way to look honestly at the things we try, buy, make and experience.
Here’s how we rate them:
★★★★★ Absolutely worth it
It delivered what we hoped for, created something meaningful, or made the experience better in a way we’d gladly choose again.
★★★★☆ Worth it, with caveats
We’re glad we did it, but there are a few things we’d change next time.
★★★☆☆ It depends
There were good parts, but whether we’d recommend it depends on your priorities, budget or circumstances.
★★☆☆☆ Probably wouldn’t do it again
The cost, effort or result didn’t quite justify the experience for us.
★☆☆☆☆ Save your money
It didn’t deliver enough value to justify what we spent. We’d choose differently next time.
These ratings aren’t about telling everyone what they should value. They’re about sharing what we learned so you can decide what’s worth it for you.
Because what works for our family, our home and our budget might not be the right choice for yours.
And that’s perfectly fine.
A Good Life Is Made Up of More Than Things
When we think about the things that matter most to us, they usually aren’t the things we spent the most money on.
They’re the meals we shared. The people who felt comfortable enough to open our refrigerator without asking. The birthdays spent in our backyard. The quiet mornings together. The rooms that make us exhale when we walk through the door.
Sometimes creating those moments takes money. Sometimes it takes time, planning and a little extra effort. And sometimes it means knowing what not to spend money on.
We’re not trying to make every day extraordinary or turn every ordinary moment into a production. We’re simply trying to be more intentional about how we spend our resources and what we want our lives to feel like.
That’s what Worth the Making is all about.
We’ll share the recipes we make, the spaces we’re creating, the celebrations we host, the purchases we’re glad we made, the experiences we try and the things we probably wouldn’t do again.
We’ll talk about what things cost, what they took to pull off, what we learned and whether we’d do them again.
Not because we have everything figured out. We don’t.
But because we believe a good life isn’t built by buying everything, doing everything or making everything look perfect.
It’s built by choosing the things that matter to us and making room for more of them.
Because it’s not necessarily about what something costs. It’s about what it creates.
Sometimes the best birthday celebrations are the ones that don’t require much planning at all.
For our birthdays, we decided to keep things simple: good food, our backyard, family and friends, and plenty of time to just enjoy being together.
We didn’t need a venue. We didn’t need a complicated schedule. We didn’t need a house full of decorations.
We just needed a place to gather.
Why We Kept It at Home
There’s something about celebrating at home that makes things feel a little more relaxed.
People can come and go, kids can be themselves, nobody is watching the clock, and there’s no pressure to make the day feel like an “event.”
For us, the backyard was exactly what we wanted. It gave everyone room to spread out, eat, talk and enjoy the day without turning the celebration into a production.
We Started With French Toast
The celebration actually started with just the three of us.
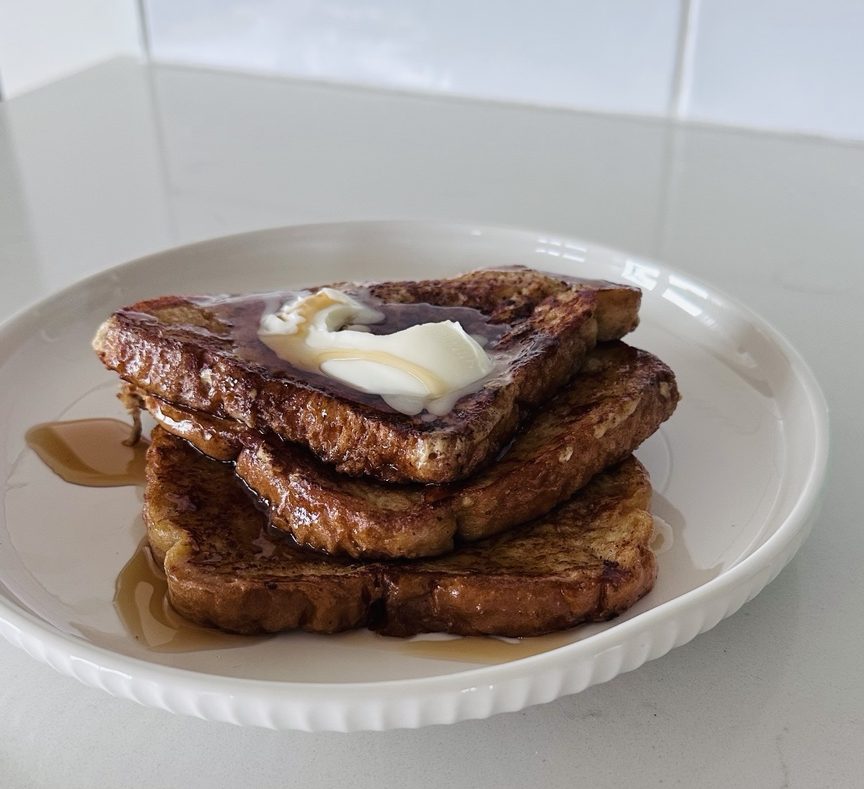
We made French toast and enjoyed a slow birthday morning together before the backyard celebration began later in the day.
Even on the quiet mornings when it’s just the three of us, we try to make the smallest occasions feel special. It doesn’t take much—sometimes it’s just making a favorite breakfast, sitting together a little longer and treating an ordinary morning like it’s worth celebrating.
I think that’s part of what we love about celebrating at home. The special moments don’t have to be big to matter.
Then We Fired Up the Grill
Later, the backyard became the center of everything.
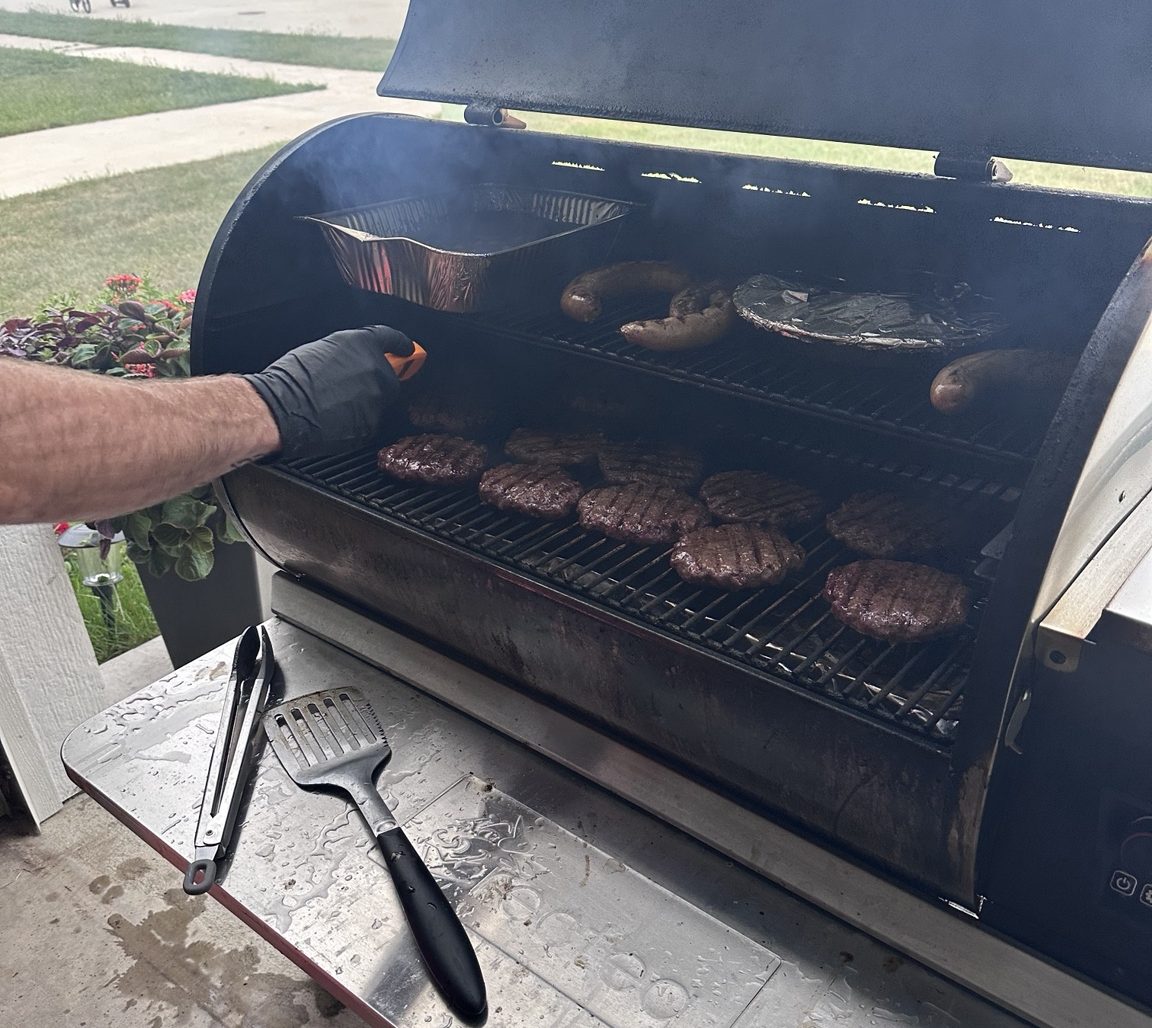
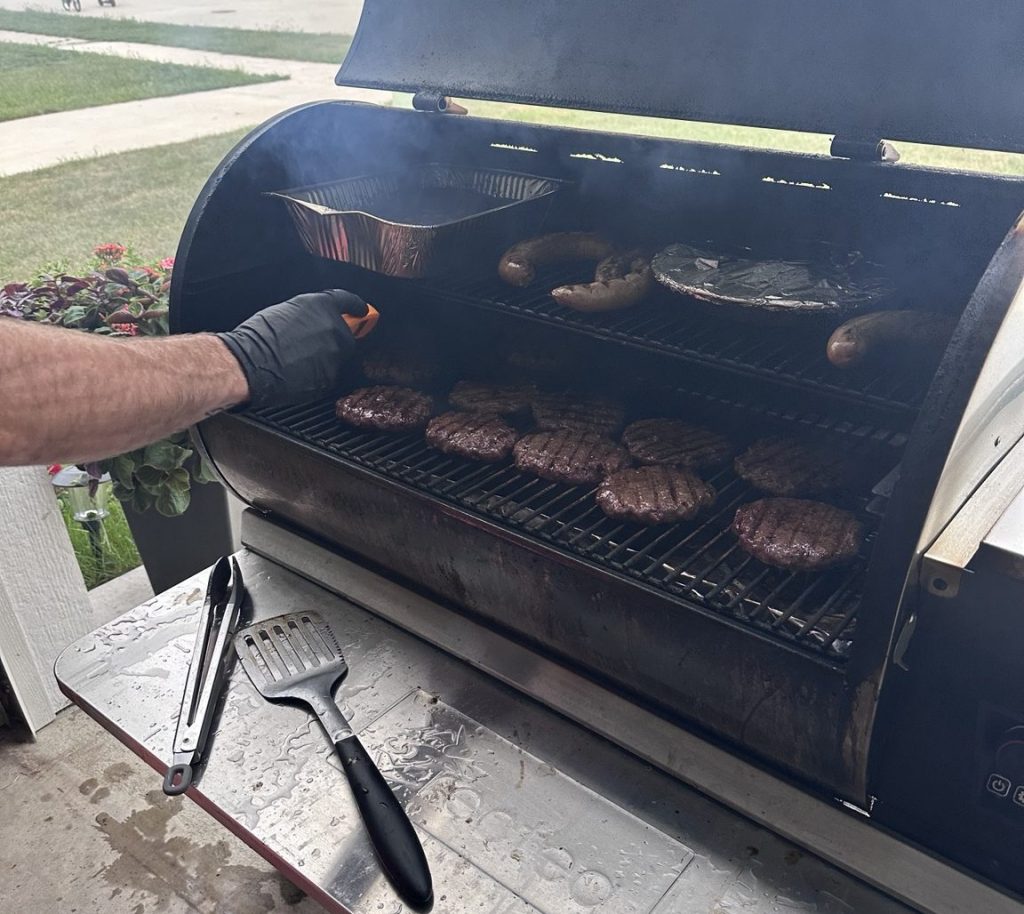
We kept the main food simple and cooked outside on the grill. Burgers and other meats gave everyone plenty of choices without requiring us to spend the day preparing a complicated menu.
That was one of the things that made this celebration work so well.
We weren’t trying to impress people with a menu. We were trying to feed the people we love, with food choices they love.
And because we were doing the cooking ourselves, we could spend our money on the things that actually mattered to us: good food and being surrounded by our favorite people.
And Yes, There Was Jell-O Cake
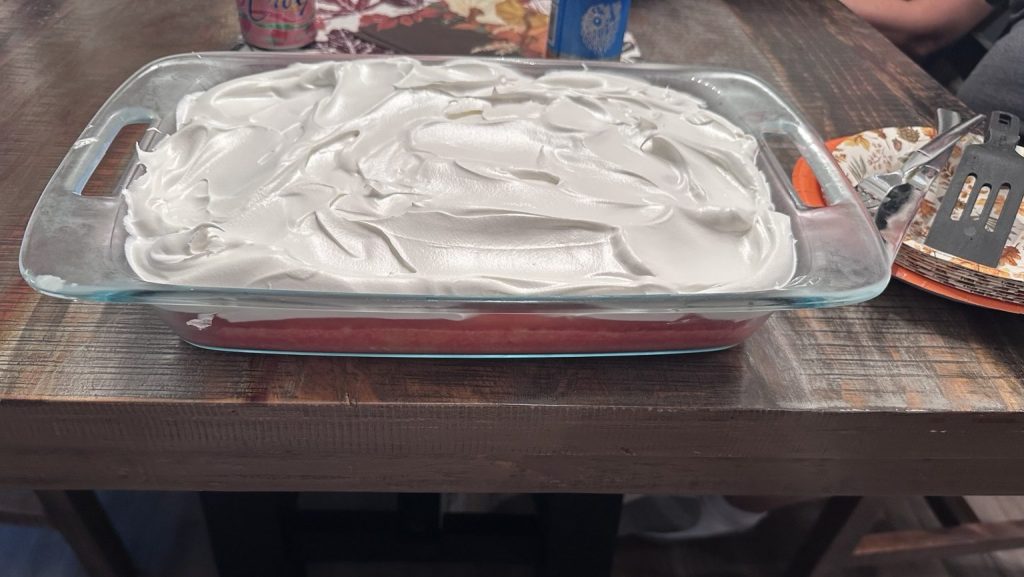
Of course there was Jell-O cake.
Brian’s favorite cake is Jell-O cake, so there wasn’t really a reason to choose anything else.
It cost about $3 to make.
We could have bought a more elaborate cake. We could have spent considerably more money on dessert.
But why?
When someone’s favorite cake costs a few dollars to make and makes them happy, that’s a pretty easy decision.
Sometimes worth it isn’t about finding something better.
Sometimes it’s about knowing when what you already love is good enough.
We weren’t trying to hit an exact number, but we did want to keep the celebration reasonable.
Here’s approximately what we spent:
Category
Approximate Cost
Meat
$120
Sides
$40
Drinks
$20
Dessert
$3
Plates & napkins
$30
Total
~$213
So our birthday celebration came in at about $213.
That’s a little more than the $200 mark, but still a pretty reasonable amount for feeding a group of people and celebrating two birthdays at home.
And more importantly, we knew where the money went.
What We Skipped
We didn’t spend money just because we thought a birthday party was supposed to have certain things.
We didn’t need a venue.
We didn’t need elaborate decorations.
We didn’t need expensive entertainment.
We didn’t need a complicated menu.
We didn’t need to make the celebration bigger just to make it feel special.
Instead, we used what we already had, cooked at home and focused our spending on food and the things we actually needed.
That’s becoming one of our favorite questions around here:
Does this actually make the experience better?
If the answer is no, why spend the money?
What Made It Worth It
The answer wasn’t the food.
It wasn’t the cake.
It wasn’t even the backyard.
It was the people.
We got to spend the day together, eat good food, laugh, talk and celebrate without rushing from one place to another.
There was no pressure to make the day perfect.
It was just a good day with people we love.
And that’s really what we’re learning with Worth the Making.
A good experience doesn’t necessarily require a big budget.
Sometimes it requires a little planning, a little effort and a willingness to enjoy what you already have.
The Worth It Test
★★★★★ Absolutely worth it
Two birthdays, a backyard and about $213?
Absolutely.
Would we do it again? Yes.
Would we spend more money just to make it bigger or fancier? Probably not.
Because when you can feed people you love, celebrate together and create a day you’ll actually remember without spending a fortune, that’s exactly what worth it looks like to us.
Sometimes the best celebrations aren’t the ones you spend the most on. They’re the ones you actually remember.