Category: Eat

Good food, real recipes and meals worth making. Easy family dinners, cooking for a crowd, entertaining ideas, recipes for gatherings and simple food that brings people together.

  • When Apple Crisp Cheesecake Goes Wrong: A Little Reminder That Life Doesn’t Always Go to Plan

    When Apple Crisp Cheesecake Goes Wrong: A Little Reminder That Life Doesn’t Always Go to Plan

    I’m actually pretty good at making cheesecake.

    I say that not to brag, but because it makes what happened next a little harder to explain.

    Brian’s favorite dessert is apple crisp. And since I already make a pretty good cheesecake, I had what seemed like a brilliant idea: Why not combine the two?

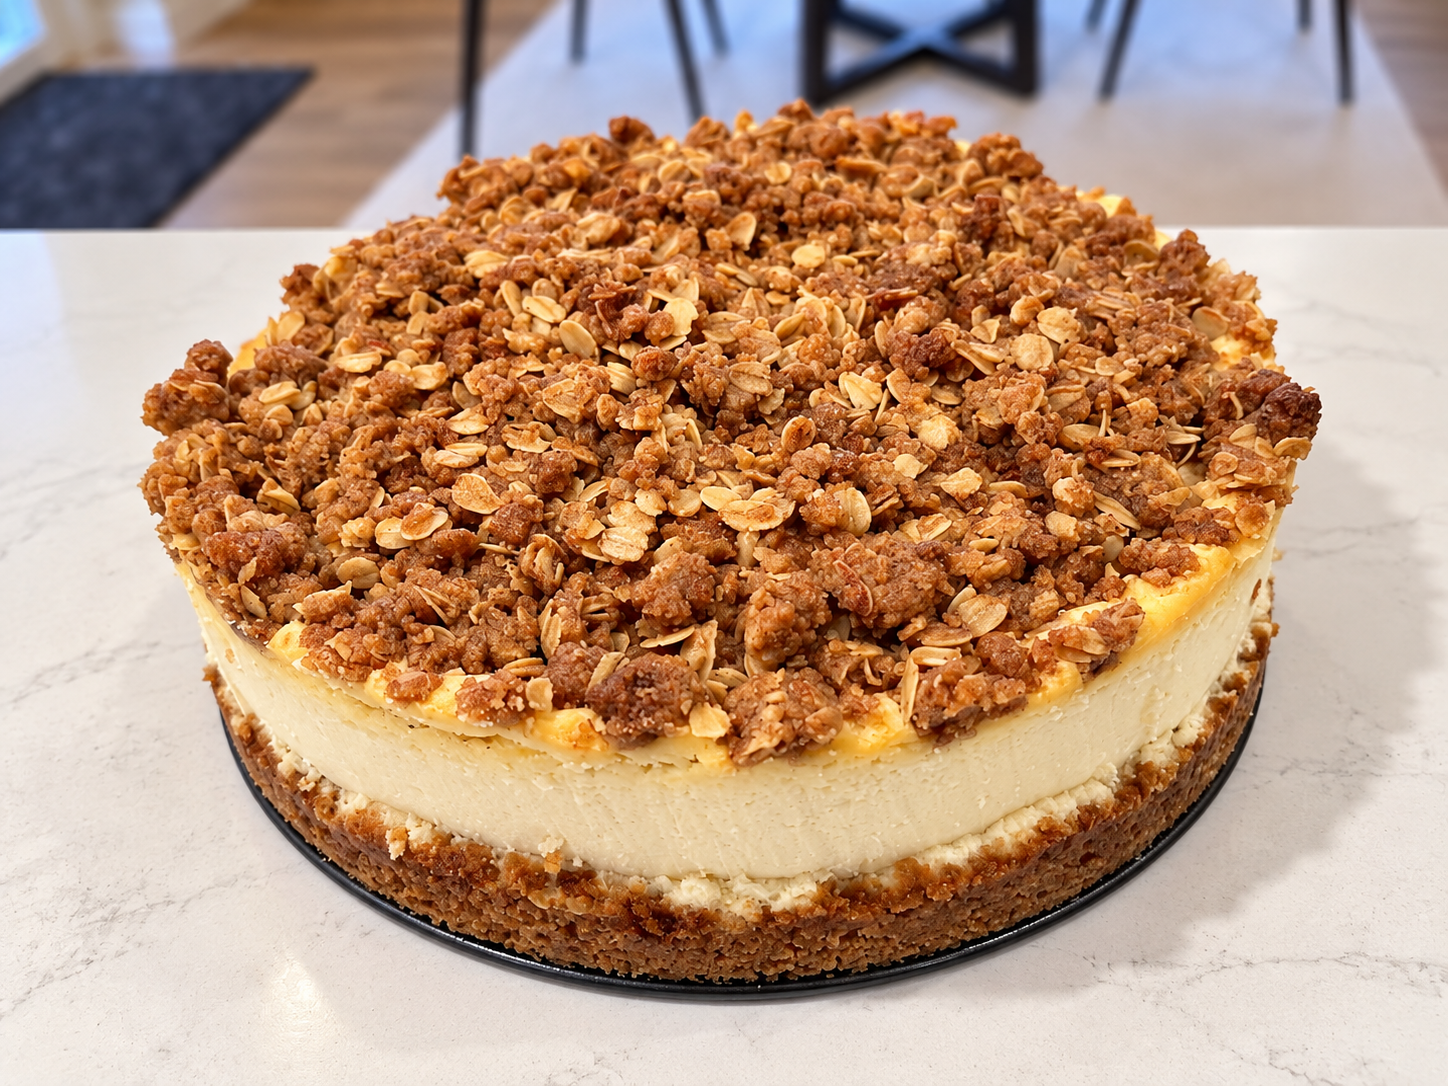
    Apple crisp cheesecake. Creamy cheesecake, thinly sliced apples, and that buttery, cinnamon-sugar crisp topping.

    In my head, this dessert was going to be fantastic.

    And honestly, from the outside, it looked pretty fantastic, too.

    A Dessert That Looked Like It Had Its Life Together

    I made my usual cheesecake recipe and added the apples and a crisp topping made with butter, flour, oats, and brown sugar.

    Everything went into the oven, and I waited for the magic to happen.

    When it came out, the top looked good. The apples and crisp topping looked like they belonged there. Nothing about the outside suggested that I was about to have a baking problem.

    Then I cut into it.

    The middle was basically soup.

    Not a little softer than expected. Not a little underdone. Soup.
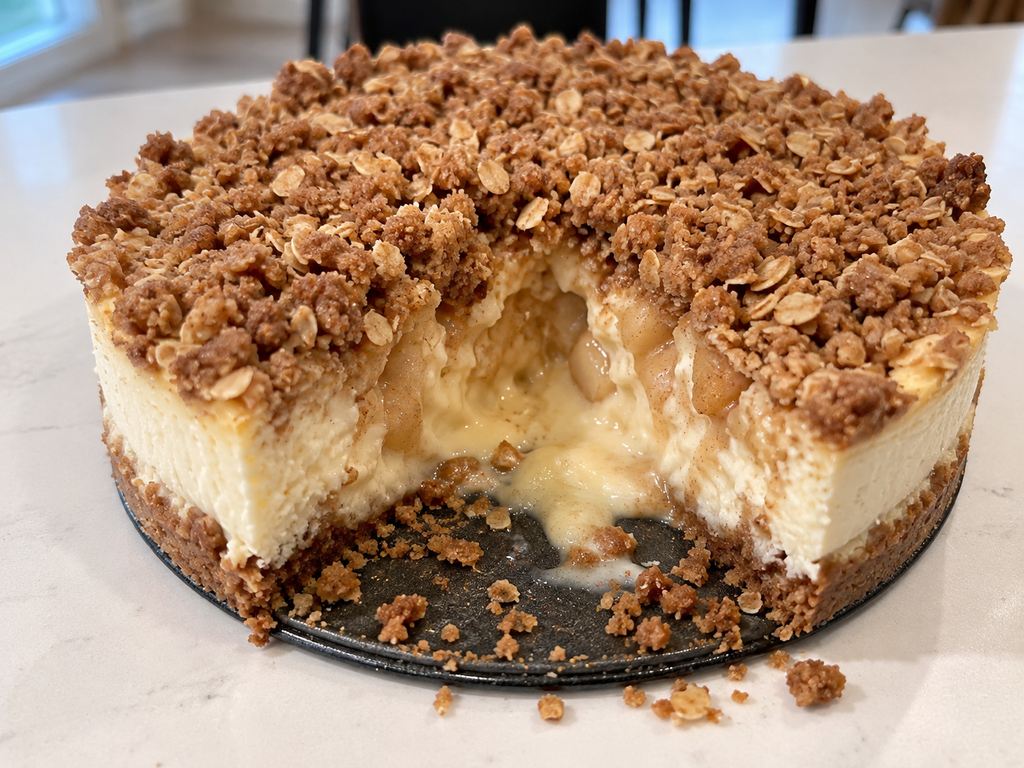
    The edges were done enough that we tried to salvage a few pieces, because wasting dessert is a hard thing to accept when you’ve put the time and ingredients into making it. But the center wasn’t going to cooperate, and eventually, the whole thing had to go.

    So much for my brilliant idea.

    I still don’t know exactly what went wrong. Maybe the added apples and topping affected how the cheesecake baked. Maybe the combination needed a different approach. Whatever the reason, my usual cheesecake recipe wasn’t enough to make this particular experiment work.

    And that happens sometimes.

    When Things Don’t Turn Out the Way You Planned

    It’s funny how a failed dessert can remind you of something bigger.

    We make plans. We put in the time. We gather the ingredients, follow the steps, and picture how everything is going to turn out.

    Sometimes it works beautifully.

    And sometimes you cut into the cheesecake and discover that the middle is soup.

    Life does that, too.

    You can make a thoughtful plan, do what you believe are all the right things, and still end up with a result you didn’t expect. A project doesn’t work out. A plan changes. Something you were excited about turns into a disappointment.

    It doesn’t necessarily mean you did everything wrong. Sometimes the plan needs adjusting. Sometimes you learn something you didn’t know before. And sometimes, despite your best efforts, the thing simply doesn’t work.

    That’s frustrating, especially when you’ve invested time, money, energy, or hope into the outcome.

    But a disappointing result doesn’t automatically make the effort a waste.

    Knowing When to Salvage It—and When to Let It Go

    With the cheesecake, we tried to save what we could. The parts that were cooked through were worth trying, but there was no point pretending the rest was going to turn into something it wasn’t.

    Eventually, we threw it away.

    There is probably a life lesson in there somewhere about knowing what to hold on to and what to let go of. I’ll leave the deep philosophical interpretation to someone who hasn’t just lost an entire cheesecake.

    But I do think there’s something useful in remembering that you don’t have to keep forcing something to work just because you’ve already invested in it.

    Sometimes you can salvage part of the plan. Sometimes you can make a change and try again. And sometimes the best thing you can do is acknowledge that it didn’t work and move on.

    You can be disappointed without deciding the whole experience was pointless.

    You can learn something without turning every mistake into a major personal-growth exercise.

    And you can decide that next time, you might approach things a little differently.

    Would I Try It Again?

    Maybe!

    I still like cheesecake. Brian still likes apple crisp. And I’m not ready to declare the combination a lost cause just because my first attempt ended in dessert soup.

    I would need to rethink the approach rather than simply repeat the same recipe and hope for a different result.

    For now, though, I have accepted that this particular cheesecake was not meant to be.

    Not every idea is a winner. Not every experiment deserves a second attempt right away. And not every kitchen mishap needs to become a new family favorite.

    Sometimes it’s just a story you get to laugh about later.

    The Worth It Test

    Was the apple crisp cheesecake worth it?

    • The dessert itself: One star. It looked promising, but the center never set properly, and we ultimately had to throw it away.
    • The experience: Still worth something. I tried an idea, learned that my usual recipe didn’t work for this combination, and got a story out of it.

    Would I count it as a successful recipe? Absolutely not.

    Would I count it as a complete waste? Not entirely.

    Because life is going to hand us a few cheesecake-soup moments along the way. Sometimes things won’t turn out the way we planned, even when we’re pretty sure we know what we’re doing.

    And that’s okay.

    Not everything has to turn out the way we planned for the experience to be worth something.
  • Easy Greek Yogurt Cinnamon Rolls (No Yeast Required)

    Easy Greek Yogurt Cinnamon Rolls (No Yeast Required)

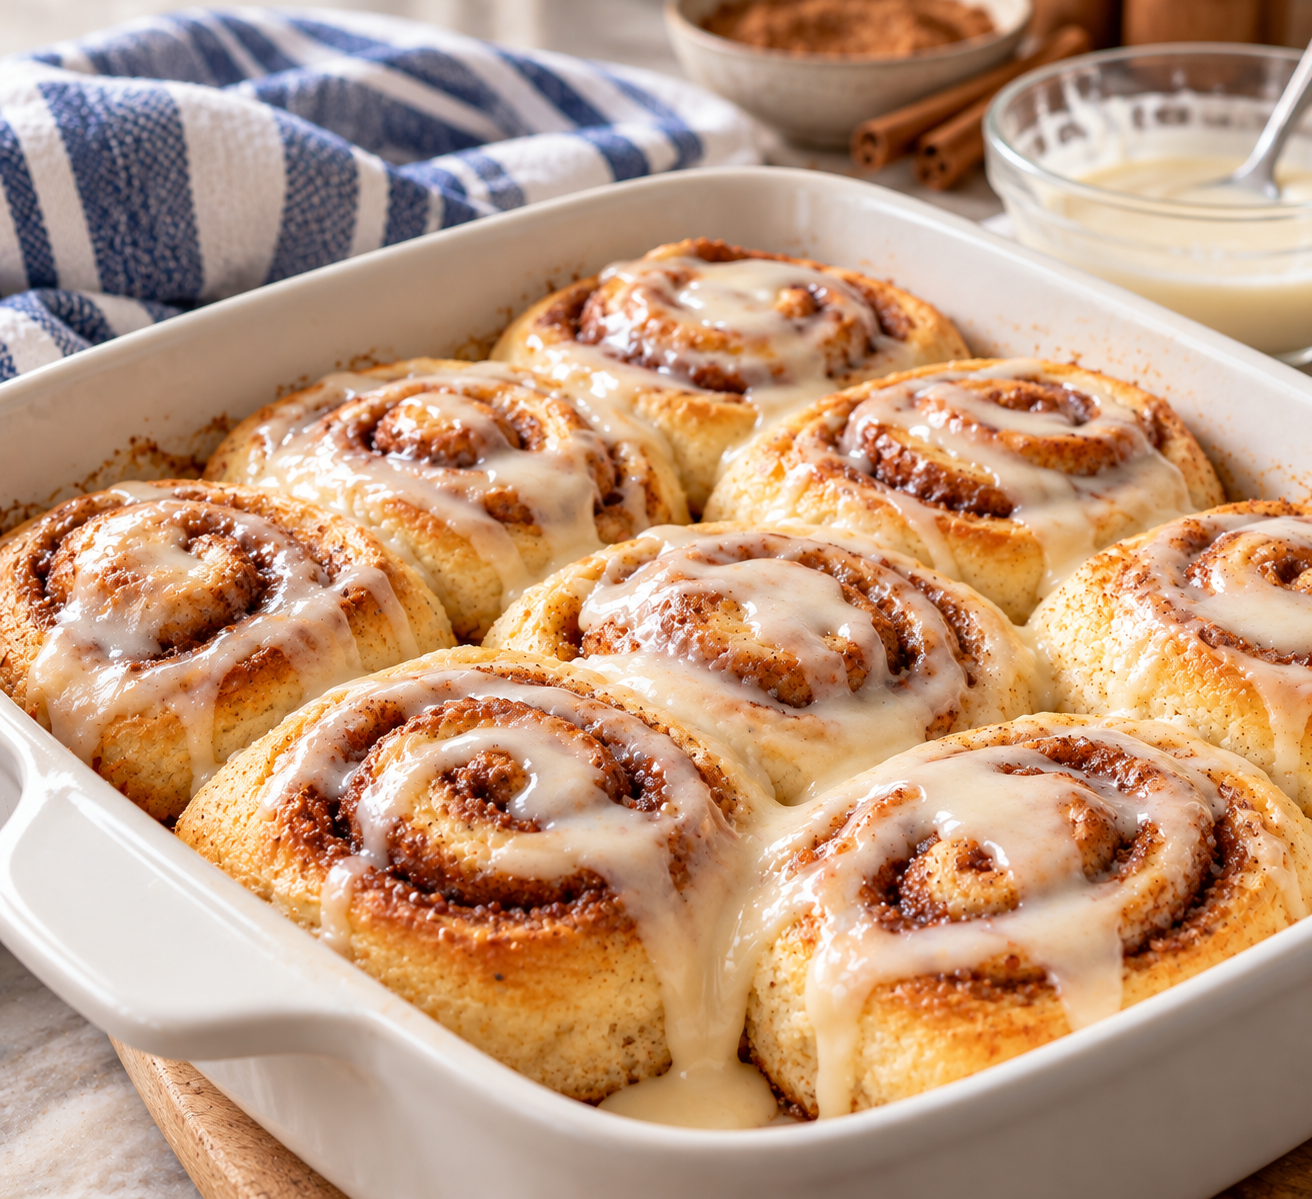
    Sometimes you want homemade cinnamon rolls without turning breakfast into an all-morning project. You want the soft dough, the cinnamon-sugar swirl, and the sweet glaze—but you don’t necessarily want to wait for yeast dough to rise.

    That’s where these Greek yogurt cinnamon rolls come in.

    This version uses baking powder and baking soda instead of yeast, with Greek yogurt to bring the dough together. Roll it out, brush it with melted butter, add brown sugar and cinnamon, then roll, slice, and bake.

    There’s no yeast and no rising time to wait through. Just a simpler way to make cinnamon rolls when the craving strikes.

    Our Greek Yogurt Cinnamon Rolls

    Prep time: Approximately 15 minutes
    Bake time: 20–25 minutes
    Oven temperature: 350°F
    Yield: 8–10 rolls

    Ingredients

    For the dough

    • 2 cups all-purpose flour
    • 2 teaspoons baking powder
    • ½ teaspoon baking soda
    • 1 cup Greek yogurt
    • 2–4 tablespoons milk

    For the cinnamon filling

    • ¼ cup melted butter, for brushing over the dough
    • ⅓ cup brown sugar
    • 1 tablespoon cinnamon

    For the glaze

    • ½ cup powdered sugar
    • ½ tablespoon vanilla
    • 1–2 teaspoons milk

    How to Make Them

    1. Mix the dry ingredients.

    In a mixing bowl, combine the flour, baking powder, and baking soda.

    2. Add the yogurt and milk.

    Add the Greek yogurt and 2 tablespoons of milk to start. Knead the mixture until a smooth dough forms, adding the remaining milk a little at a time as needed to bring the dough together.

    3. Roll out the dough.

    On a lightly floured surface, roll the dough into a rectangle about ¼ inch thick.

    4. Add the butter and cinnamon-sugar filling.

    Brush the melted butter over the rolled-out dough. Sprinkle the brown sugar and cinnamon evenly across the surface.

    5. Roll and slice.

    Roll the dough into a log, then cut it into approximately 8–10 rolls.

    6. Arrange in a baking dish.

    Place the rolls in a greased baking dish, leaving a little space between them.

    7. Bake.

    Bake uncovered at 350°F for 20–25 minutes, until the rolls are cooked through and lightly golden.

    8. Make the glaze.

    While the rolls bake, whisk together the powdered sugar, vanilla, and 1 teaspoon of milk. Add the remaining milk as needed to reach a consistency you can drizzle over the rolls.

    9. Drizzle and serve.

    When the rolls come out of the oven, drizzle the glaze over the top. Serve warm.

    Why We Like This Shortcut

    Traditional cinnamon rolls made with yeast can be wonderful, but they take more time because the dough needs to rise.

    This version skips that waiting period. The Greek yogurt, flour, baking powder, and baking soda make a different kind of dough, but the process is straightforward and the cinnamon-sugar filling gives you the familiar flavor that makes cinnamon rolls so appealing.

    It’s a good option for a weekend breakfast or a sweet treat when you don’t want to plan hours ahead.

    The Little Things That Matter

    A few simple details help this recipe come together:

    • Add the milk gradually. Start with 2 tablespoons and add more as needed until the dough comes together smoothly.
    • Roll the dough evenly. Aim for about ¼ inch thick so you can spread the filling and roll it into a log.
    • Leave a little space between the rolls. They’ll have room to bake in the dish.
    • Glaze while warm. Drizzling the glaze over the rolls as soon as they come out of the oven gives you that sweet finish without another complicated step.

    The Worth It Test

    ★★★★☆ Worth it, with caveats.

    These cinnamon rolls are worth trying when you want a homemade cinnamon-roll treat without the time commitment of yeast dough.

    The biggest advantage is convenience: no yeast, no rising time, and a short list of everyday ingredients. The trade-off is that this is a shortcut-style dough, so the texture won’t be exactly the same as traditional yeast cinnamon rolls.

    For a quicker homemade option that still delivers cinnamon, brown sugar, butter, and sweet glaze, that’s a trade-off worth considering.

    And sometimes, the best recipe is the one that makes a little treat possible on an ordinary morning.

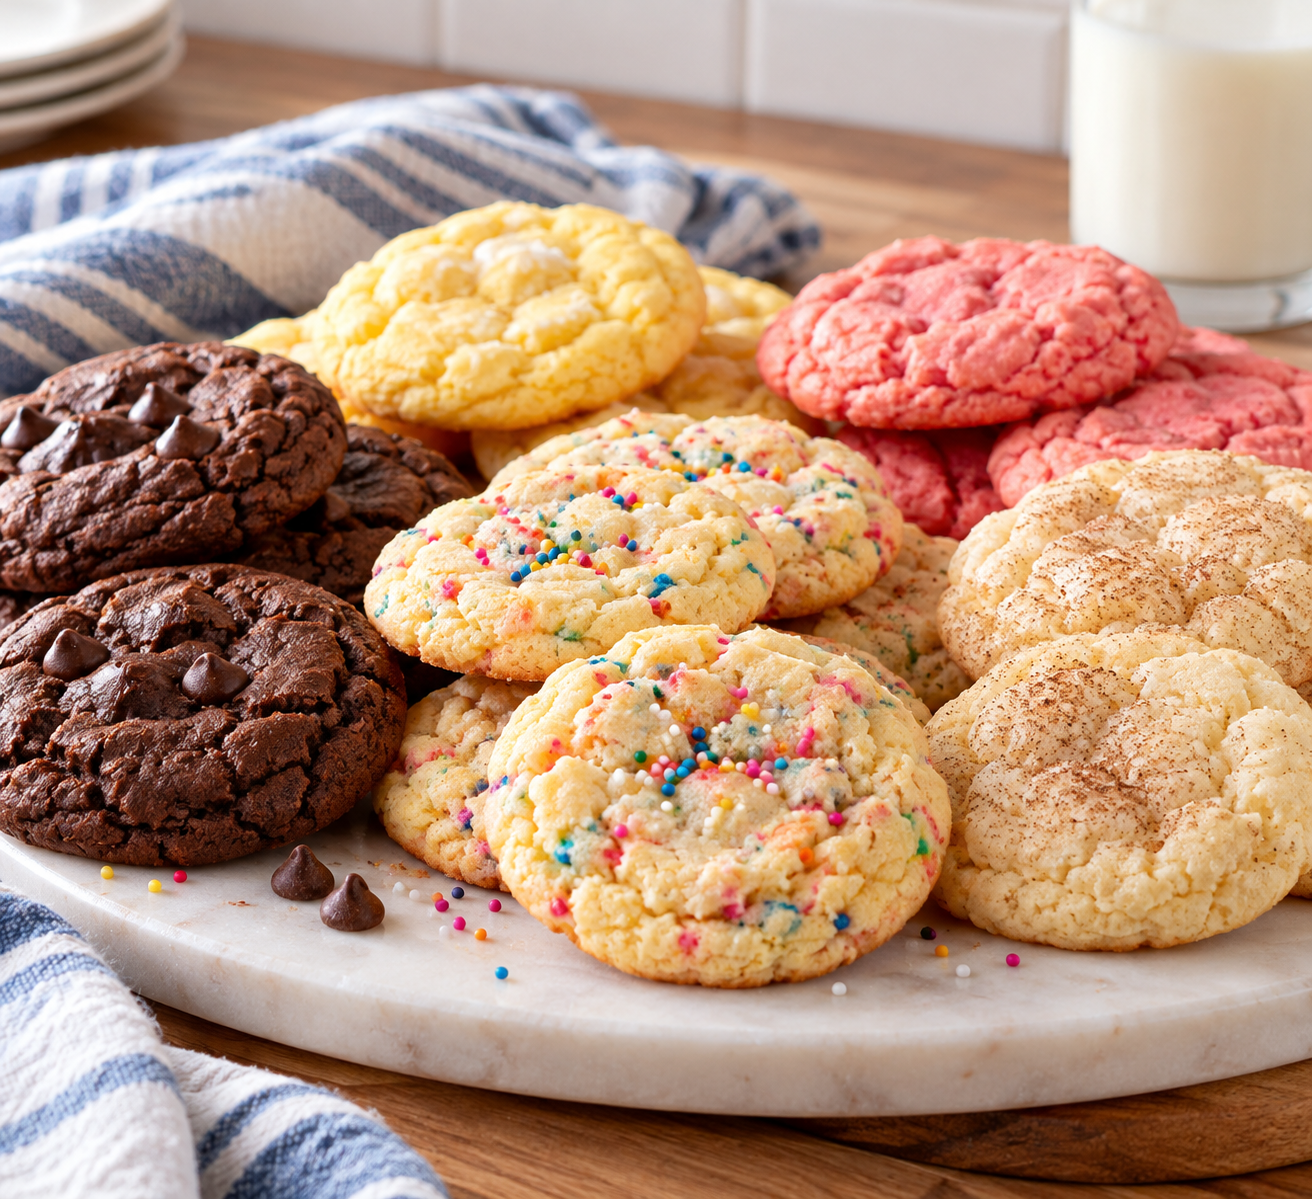
  • Three-Ingredient Cake-Mix Cookies: The Easiest Cookies We Make

    Three-Ingredient Cake-Mix Cookies: The Easiest Cookies We Make

    Sometimes you want homemade cookies without the time, mess, and long ingredient list that can come with baking from scratch.

    That’s where these cake-mix cookies come in.

    They’re one of those easy recipes that make you wonder why you ever needed a complicated cookie recipe in the first place. You need just three ingredients: a box of cake mix, two eggs, and melted butter.

    The best part? You can change the flavor simply by changing the cake mix.

    No complicated prep. No chilling the dough. Just mix, scoop, and bake.

    Our Three-Ingredient Cake-Mix Cookies

    Prep time: About 5 minutes
    Bake time: 9–11 minutes
    Oven temperature: 350°F
    Difficulty: Easy

    Ingredients

    • 1 standard box of cake mix
    • 2 eggs
    • ½ cup melted butter

    That’s it. Three ingredients, and you’re ready to make cookies.

    How to Make Them

    1. Preheat the oven.

    Preheat your oven to 350°F and prepare a baking sheet.

    2. Mix the ingredients.

    Combine the cake mix, eggs, and melted butter in a bowl. Mix until a cookie dough forms.

    3. Scoop onto the baking sheet.

    Scoop the dough directly onto your prepared baking sheet. There’s no need to chill the dough first, which makes this recipe especially convenient when you want cookies without a lot of planning.

    4. Bake.

    Bake for 9–11 minutes at 350°F.

    Look for edges that are set and just beginning to turn light brown. The cookies should feel a little firm, but you don’t want to leave them in the oven until they’re hard.

    5. Cool according to how they’re baking.

    This is where a little experience helps. If the cookies look like they’re already a little more done than you wanted, move them off the hot baking sheet right away. If they need a little more time to set, leave them on the pan for a few minutes before transferring them.

    Keep in mind that the hot baking sheet will continue cooking the bottoms after the pan comes out of the oven.

    Change the Flavor, Keep the Easy Recipe

    One of my favorite things about this recipe is how easy it is to change.

    Choose a different cake-mix flavor, and you’ve got a different cookie without learning a new recipe. It’s an easy way to experiment with flavors while keeping the same three-ingredient foundation.

    It’s also a good recipe to keep in mind when you want to bring cookies to a gathering, make a quick treat for the family, or satisfy a sweet craving without a big baking project.

    Why We Love This Shortcut

    Not every homemade treat needs to start with flour, sugar, baking powder, and a long list of ingredients.

    Sometimes, a shortcut makes sense.

    Using cake mix cuts down on measuring and keeps the ingredient list short. The eggs and melted butter turn it into cookie dough, and the different cake-mix flavors give you plenty of ways to change things up.

    It’s simple, flexible, and approachable—even if baking isn’t usually your thing.

    The Worth It Test

    ★★★★★ Absolutely worth it.

    These cookies earn their place in our recipe rotation because they’re inexpensive to make, easy to customize, and don’t require much time or effort.

    Three ingredients. One bowl. No chilling. Less than 15 minutes in the oven.

    They may not be an elaborate, made-from-scratch bakery cookie, but that’s not what we’re going for here. We’re looking for an easy homemade treat that tastes good without turning the kitchen into a project.

    And sometimes, that’s exactly what’s worth the making.

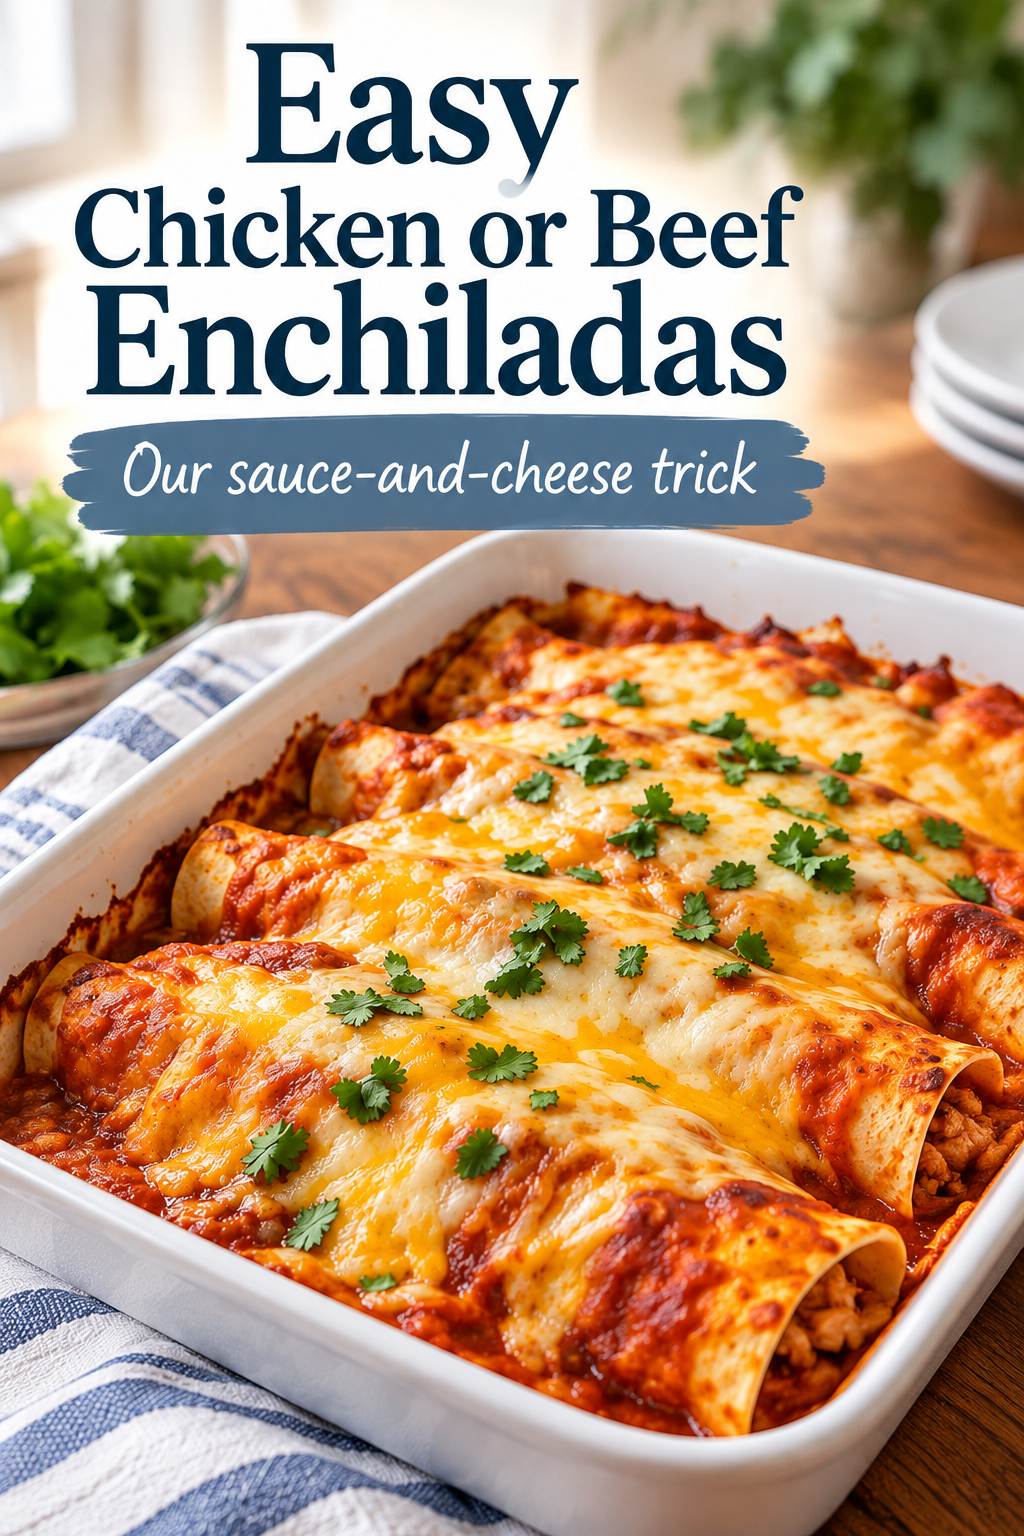
  • Our Easy Chicken or Beef Enchiladas: The Sauce-and-Cheese Trick We Love

    Our Easy Chicken or Beef Enchiladas: The Sauce-and-Cheese Trick We Love

    Our Easy Chicken or Beef Enchiladas: The Sauce-and-Cheese Trick We Love

    Some dinners don’t need a complicated recipe to make everyone happy. In our house, enchiladas are one of those meals that feel hearty, comforting, and worth the little bit of effort it takes to put them together.

    We keep things simple. We use fresh rotisserie chicken when we want an easy shortcut, or ground beef when that’s what sounds good. We make Spanish rice separately, grab a can of red enchilada sauce, and build each enchilada with meat, rice, and cheddar cheese.

    But the part I wouldn’t skip? Dipping the flour tortillas in enchilada sauce before filling them, then covering the finished enchiladas with even more sauce and plenty of cheese.

    It’s not fancy, and it doesn’t require making everything from scratch. It just works for us.

    Our Easy Enchilada Recipe

    Prep time: Approximately 20 minutes, depending on your filling
    Cook time: About 30 minutes
    Oven temperature: 350°F
    Difficulty: Easy

    Ingredients

    • Flour tortillas
    • 1 fresh rotisserie chicken, picked up the day you plan to make the enchiladas, or ground beef
    • Spanish rice, prepared separately
    • Shredded cheddar cheese for the filling
    • 1 can or more of red Old El Paso enchilada sauce, as needed to coat the tortillas and cover the finished enchiladas
    • 1 bag (8 ounces) shredded cheddar cheese for the topping
    • 4–8 ounces shredded mozzarella cheese for the topping

    You’ll also need a baking dish.

    The amount of sauce, filling, and cheese you need will depend on how many enchiladas you make and the size of your baking dish. We use enough sauce to cover the enchiladas completely and don’t skimp on the cheese.

    How to Make Them

    1. Prepare the filling.

    If you’re using rotisserie chicken, remove the meat from the chicken and shred or chop it into bite-sized pieces.

    If you’re using ground beef, brown it in a skillet and drain the grease. We don’t add extra seasoning because the enchilada sauce and Spanish rice bring plenty of flavor.

    Prepare the Spanish rice separately according to its package directions or your usual method.

    2. Get your assembly station ready.

    Set out your flour tortillas, prepared meat, Spanish rice, cheddar cheese, and a plate with some of the red enchilada sauce poured onto it. Have your baking dish ready, too.

    This makes assembly easier because you can fill and roll each tortilla without stopping to gather ingredients.

    3. Dip each tortilla in enchilada sauce.

    Take a flour tortilla and dip it into the sauce on the plate, coating it before adding the filling.

    This is one of our favorite steps because the sauce gets onto the tortilla before everything is rolled together.

    4. Fill and roll the enchiladas.

    Add some meat, Spanish rice, and cheddar cheese to the tortilla. Wrap it up and place it seam-side down in your baking dish.

    Repeat with the remaining tortillas until you’ve filled the dish.

    5. Cover everything with more sauce and cheese.

    Pour more red enchilada sauce over the assembled enchiladas until they’re completely covered.

    Sprinkle the top with the 8-ounce bag of shredded cheddar cheese, followed by approximately 4–8 ounces of mozzarella.

    This is not the time to be shy with the cheese. The combination of cheddar and mozzarella gives the top a delicious, cheesy finish.

    6. Bake uncovered.

    Place the baking dish in a preheated 350°F oven and bake uncovered for about 30 minutes, or until the cheese is melted and the edges of the tortillas are crispy.

    Keep an eye on them toward the end, since ovens and baking dishes can affect how quickly the edges brown.

    7. Serve and enjoy.

    Serve the enchiladas warm. Since the Spanish rice is already inside, you’ve got a hearty meal in every tortilla.

    Yield: 6–8 enchiladas
    Prep time: About 20 minutes
    Cook time: About 30 minutes
    Oven temperature: 350°F

    Why We Keep This Recipe Simple

    You could make enchilada sauce from scratch, season the meat with a long list of spices, and spend extra time preparing every component.

    But we don’t find that necessary for this version.

    A fresh rotisserie chicken makes dinner easier on a busy day. Ground beef works just as well when that’s what we have planned. The rice and sauce contribute plenty of flavor, and the cheese brings everything together.

    It’s a good reminder that cooking a satisfying meal doesn’t mean every ingredient has to be homemade.

    Sometimes the shortcut is worth taking.

    The Little Technique That Makes a Difference

    The sauce does double duty in this recipe.

    First, we dip each flour tortilla in enchilada sauce before adding the filling. Then, after the enchiladas are rolled and arranged in the baking dish, we pour on more sauce until they’re covered completely.

    The cheese goes on last: cheddar, followed by mozzarella.

    That combination is what makes these enchiladas our kind of comfort food. They’re saucy, cheesy, filling, and easy enough to make without turning dinner into an all-day project.

    And baking them uncovered gives the edges a chance to crisp up, which is one of our favorite parts.

    Make It Your Own

    This recipe is flexible enough to work with what you have.

    Use rotisserie chicken when you want to save time, or brown some ground beef if that’s what you prefer. Adjust the number of tortillas to suit your family, and use enough sauce and cheese to cover the dish the way you like it.

    You don’t need a complicated recipe with perfectly measured amounts for every ingredient. Start with a simple method, pay attention to what your family enjoys, and make it your own.

    The Worth It Test

    ★★★★★ Absolutely worth it.

    These enchiladas earn their place in our dinner rotation because they’re comforting, adaptable, and straightforward to prepare.

    The rotisserie chicken shortcut saves time. Ground beef is easy to prepare. The sauce and rice add plenty of flavor without extra seasoning, and the cheddar-mozzarella topping makes the whole dish feel generous and satisfying.

    It’s not about doing everything from scratch. It’s about knowing which parts matter to you and making a good meal without making dinner harder than it needs to be.

    And that’s what makes it worth the making.

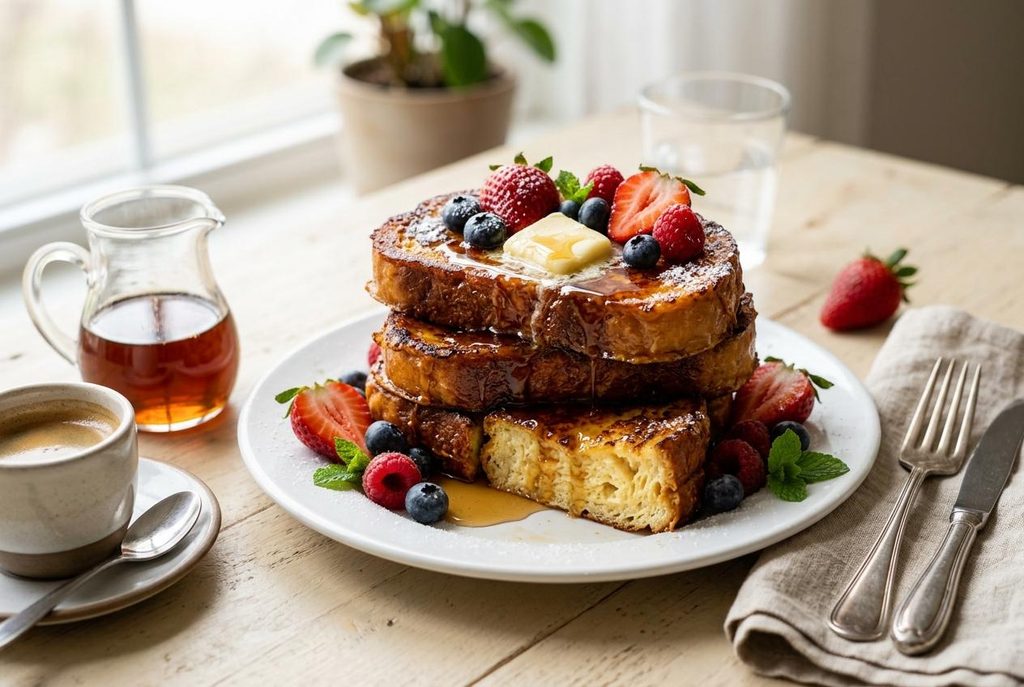
  • Our French Toast Trick: The Simple Ingredient That Makes It Better

    Our French Toast Trick: The Simple Ingredient That Makes It Better

    Our French Toast Trick: The Simple Ingredient That Makes It Better

    Some weekend mornings call for something a little sweeter than the usual breakfast. French toast is one of our favorites because it’s easy, uses ingredients we usually have on hand, and makes an ordinary morning feel a little more special.

    Our little trick? We add maple syrup directly to the egg mixture.

    It’s a small change, but it adds sweetness throughout the French toast—not just on top. With cinnamon, half-and-half, and a little butter in the skillet, you have a simple breakfast that feels like a treat without a complicated recipe.

    Our Easy French Toast Recipe

    Prep time: 5 minutes
    Cook time: Approximately 10–15 minutes
    Yield: About 4–6 slices

    Ingredients

    • 3 eggs
    • ½ cup half-and-half
    • 1 tablespoon maple syrup
    • 1 teaspoon cinnamon
    • 4–6 slices of bread, depending on thickness
    • Butter for frying

    For serving:

    • Butter
    • Maple syrup
    • Fresh fruit
    • Whipped cream

    How to Make French Toast

    1. Whisk together the egg mixture.

    In a shallow bowl, whisk the eggs, half-and-half, maple syrup, and cinnamon until combined.

    2. Dip and briefly soak the bread.

    Dip each slice of bread into the mixture, coating both sides, and let it soak briefly so it absorbs some of the mixture. Use whatever bread you have on hand. Thicker slices may need a little longer than thinner ones.

    3. Cook in butter.

    Heat a skillet over medium heat and melt a little butter. Place the dipped bread in the skillet and cook until golden brown. Flip and cook the other side until evenly browned and the egg mixture is cooked through.

    The trick is to avoid turning the heat up too high. If the outside browns before the middle is cooked, lower the heat and give it a little more time.

    4. Add your favorite toppings.

    Serve warm with butter and maple syrup. Fresh fruit and whipped cream make it feel extra special, but the toppings are entirely up to you.

    That’s it. No special equipment, no complicated ingredients, and no need to make a grocery trip just for breakfast.

    The Little Trick That Makes It Better

    Maple syrup usually goes on French toast after it’s cooked. We add a tablespoon to the egg mixture, too.

    That little bit of sweetness becomes part of the French toast itself, while the syrup on top adds another layer of flavor.

    It’s not a complicated cooking technique or a secret ingredient you have to track down. It’s just a small adjustment to a breakfast we already love.

    And sometimes, those are the changes worth keeping.

    Use What You Have

    One of the things we appreciate about this recipe is its flexibility. You don’t have to buy a special loaf of bread to make good French toast.

    Use what’s already in the kitchen. The cooking time may vary depending on the thickness and type of bread, so pay attention to how it’s browning and make sure the center cooks through.

    Serve it with whatever fruit you have, add whipped cream if you’re in the mood, or keep things simple with butter and syrup.

    You don’t have to turn every weekend breakfast into an event. But when you’re craving something sweet, a few everyday ingredients can go a long way.

    The Worth It Test

    ★★★★★ Absolutely worth it.

    This recipe earns its place in our weekend rotation because it delivers something special without asking much in return.

    The ingredients are simple, the preparation is easy, and the maple syrup trick takes almost no extra effort. Best of all, you can use the bread you already have instead of making a special trip to the store.

    It’s not about creating the fanciest breakfast. It’s about taking something simple and making it a little better.

    And that’s what makes it worth the making.

  • Two Birthdays, One Backyard

    Two Birthdays, One Backyard

    Sometimes the best birthday celebrations are the ones that don’t require much planning at all.

    For our birthdays, we decided to keep things simple: good food, our backyard, family and friends, and plenty of time to just enjoy being together.

    We didn’t need a venue. We didn’t need a complicated schedule. We didn’t need a house full of decorations.

    We just needed a place to gather.

    Why We Kept It at Home

    There’s something about celebrating at home that makes things feel a little more relaxed.

    People can come and go, kids can be themselves, nobody is watching the clock, and there’s no pressure to make the day feel like an “event.”

    For us, the backyard was exactly what we wanted. It gave everyone room to spread out, eat, talk and enjoy the day without turning the celebration into a production.

    We Started With French Toast

    The celebration actually started with just the three of us.

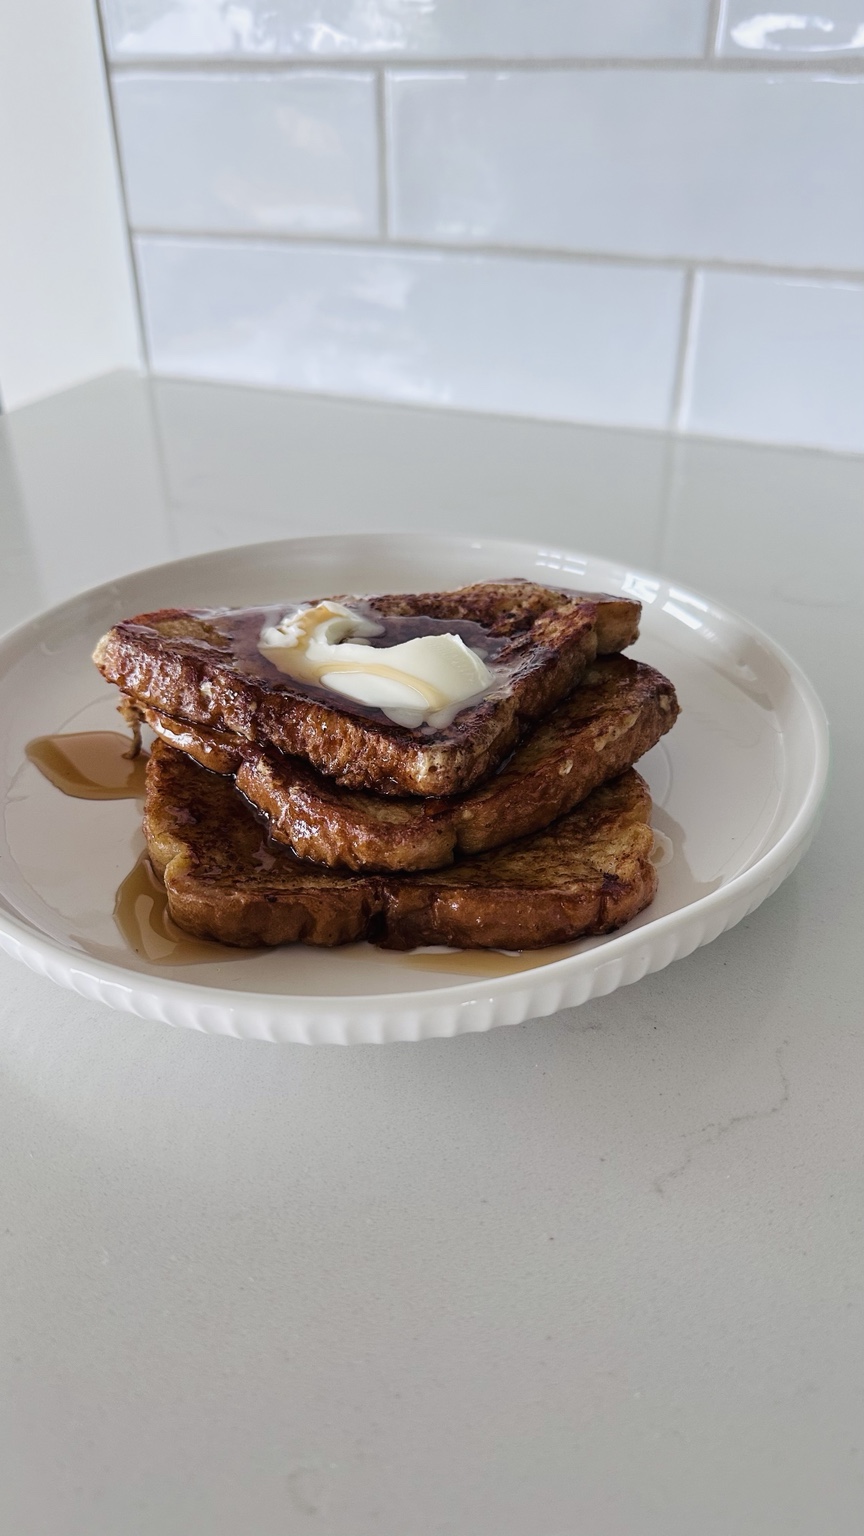
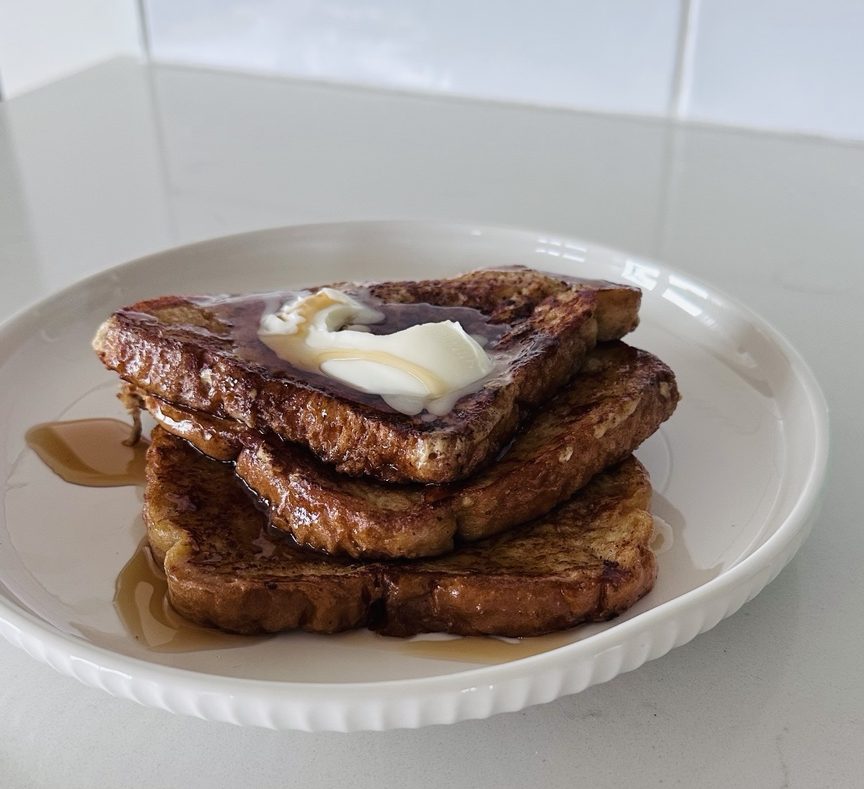
    We made French toast and enjoyed a slow birthday morning together before the backyard celebration began later in the day.

    Even on the quiet mornings when it’s just the three of us, we try to make the smallest occasions feel special. It doesn’t take much—sometimes it’s just making a favorite breakfast, sitting together a little longer and treating an ordinary morning like it’s worth celebrating.

    I think that’s part of what we love about celebrating at home. The special moments don’t have to be big to matter.

    French toast breakfast shared by a family on a quiet birthday morning

    Then We Fired Up the Grill

    Later, the backyard became the center of everything.

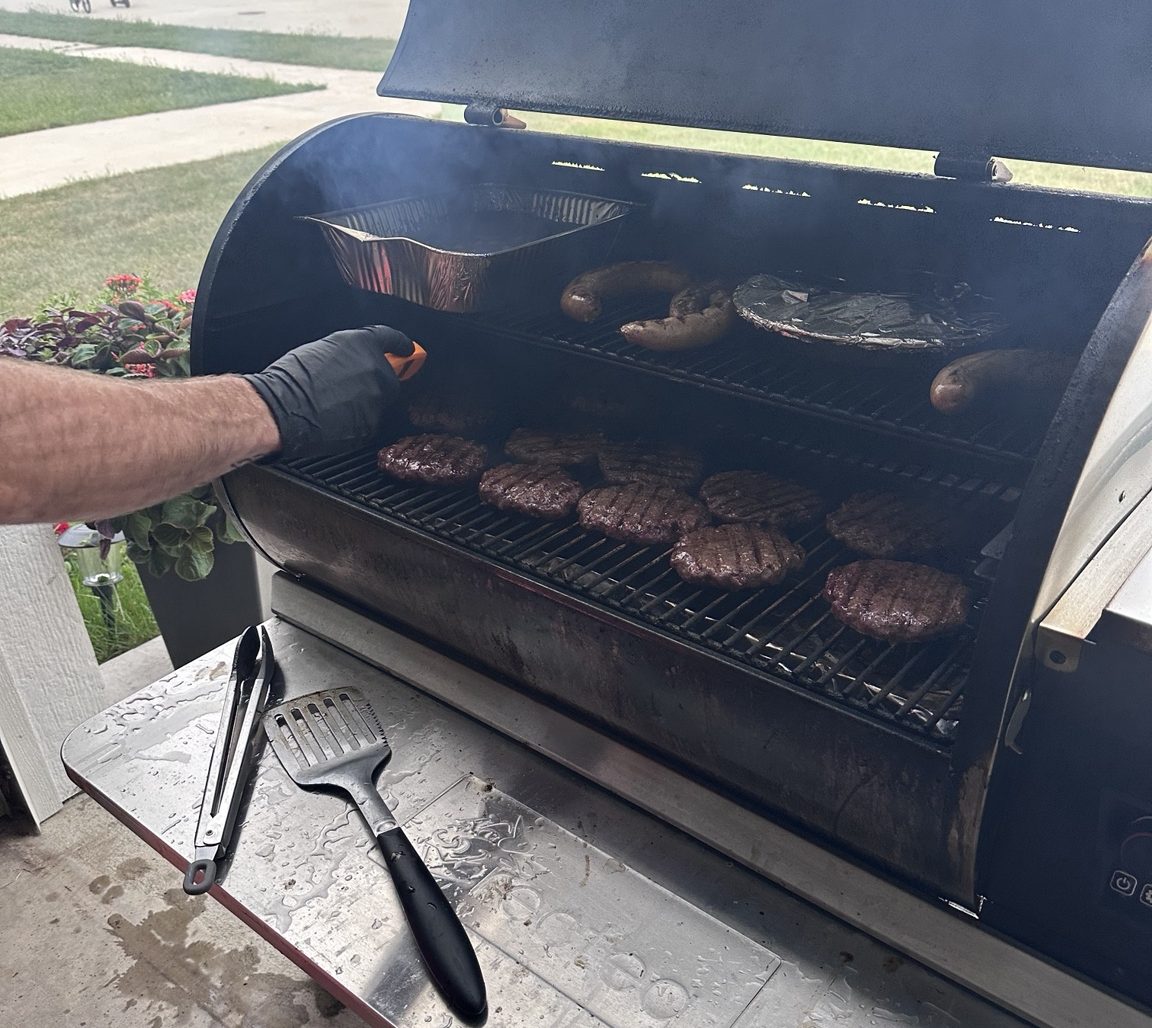
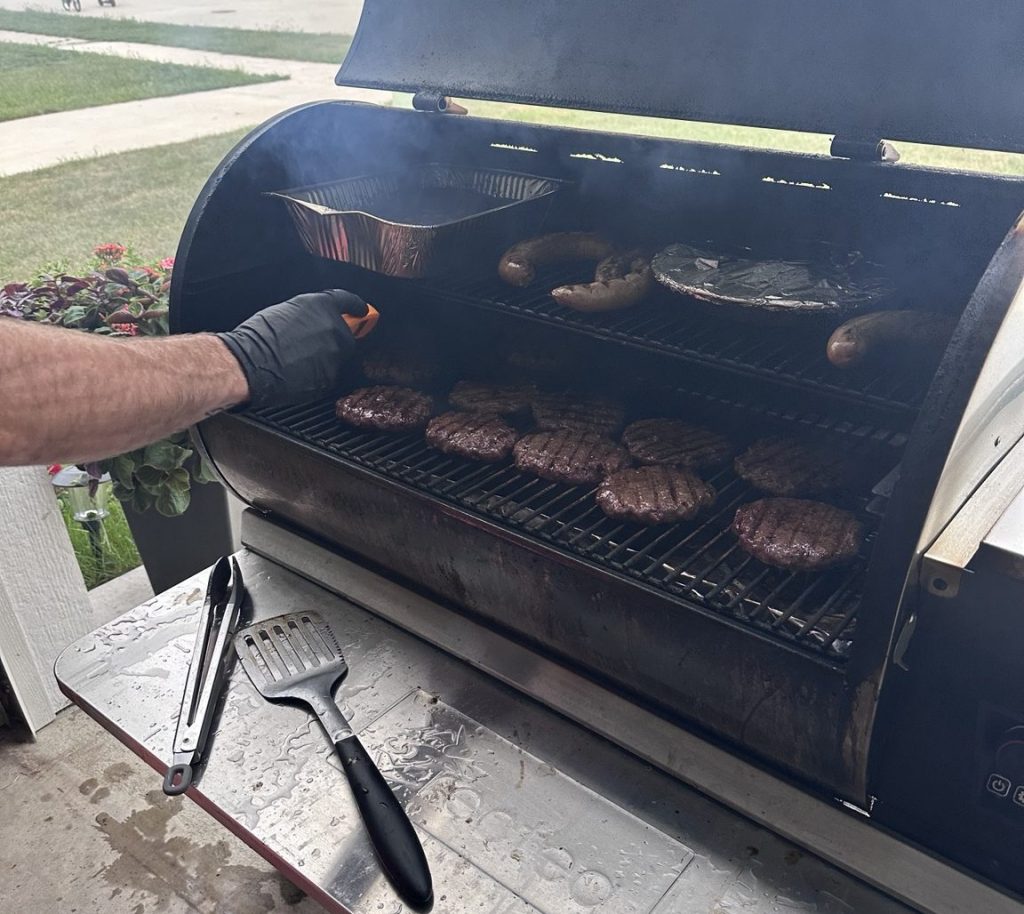
    We kept the main food simple and cooked outside on the grill. Burgers and other meats gave everyone plenty of choices without requiring us to spend the day preparing a complicated menu.

    That was one of the things that made this celebration work so well.

    We weren’t trying to impress people with a menu. We were trying to feed the people we love, with food choices they love.

    And because we were doing the cooking ourselves, we could spend our money on the things that actually mattered to us: good food and being surrounded by our favorite people.

    Backyard grilling burgers and other meats for a family birthday celebration

    And Yes, There Was Jell-O Cake

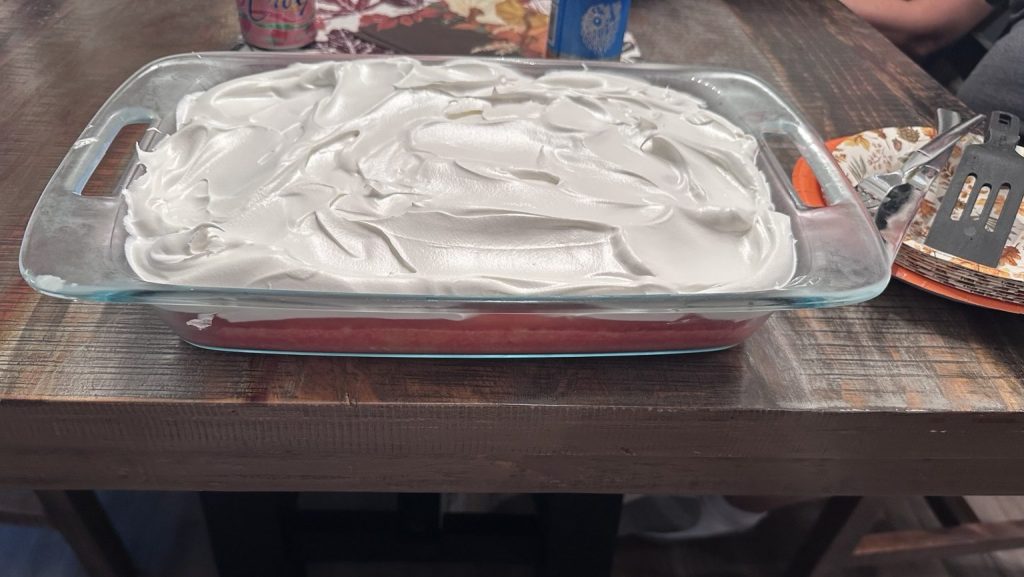
    Of course there was Jell-O cake.

    Brian’s favorite cake is Jell-O cake, so there wasn’t really a reason to choose anything else.

    It cost about $3 to make.

    We could have bought a more elaborate cake. We could have spent considerably more money on dessert.

    But why?

    When someone’s favorite cake costs a few dollars to make and makes them happy, that’s a pretty easy decision.

    Sometimes worth it isn’t about finding something better.

    Sometimes it’s about knowing when what you already love is good enough.

    We shared the full breakdown of that birthday celebration—including what we served and what we spent—in How We Fed 24 People for Around $200.

    Homemade Jell-O cake made for a family birthday celebration

    What We Actually Spent

    We weren’t trying to hit an exact number, but we did want to keep the celebration reasonable.

    Here’s approximately what we spent:

    CategoryApproximate Cost
    Meat$120
    Sides$40
    Drinks$20
    Dessert$3
    Plates & napkins$30
    Total~$213

    So our birthday celebration came in at about $213.

    That’s a little more than the $200 mark, but still a pretty reasonable amount for feeding a group of people and celebrating two birthdays at home.

    And more importantly, we knew where the money went.

    What We Skipped

    We didn’t spend money just because we thought a birthday party was supposed to have certain things.

    We didn’t need a venue.

    We didn’t need elaborate decorations.

    We didn’t need expensive entertainment.

    We didn’t need a complicated menu.

    We didn’t need to make the celebration bigger just to make it feel special.

    Instead, we used what we already had, cooked at home and focused our spending on food and the things we actually needed.

    That’s becoming one of our favorite questions around here:

    Does this actually make the experience better?

    If the answer is no, why spend the money?

    What Made It Worth It

    The answer wasn’t the food.

    It wasn’t the cake.

    It wasn’t even the backyard.

    It was the people.

    We got to spend the day together, eat good food, laugh, talk and celebrate without rushing from one place to another.

    There was no pressure to make the day perfect.

    It was just a good day with people we love.

    And that’s really what we’re learning with Worth the Making.

    A good experience doesn’t necessarily require a big budget.

    Sometimes it requires a little planning, a little effort and a willingness to enjoy what you already have.

    The Worth It Test

    ★★★★★ Absolutely worth it

    Two birthdays, a backyard and about $213?

    Absolutely.

    Would we do it again? Yes.

    Would we spend more money just to make it bigger or fancier? Probably not.

    Because when you can feed people you love, celebrate together and create a day you’ll actually remember without spending a fortune, that’s exactly what worth it looks like to us.

    Sometimes the best celebrations aren’t the ones you spend the most on. They’re the ones you actually remember.